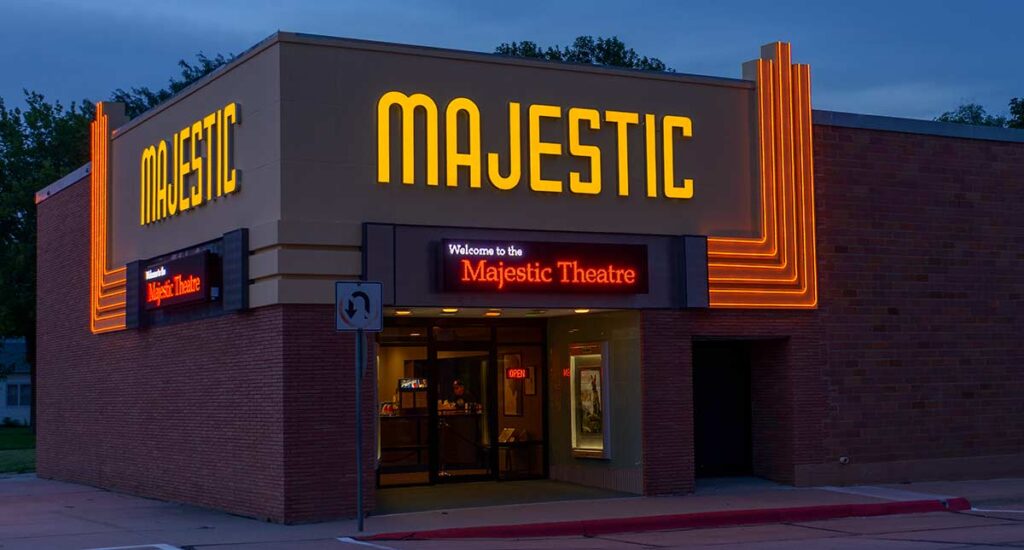
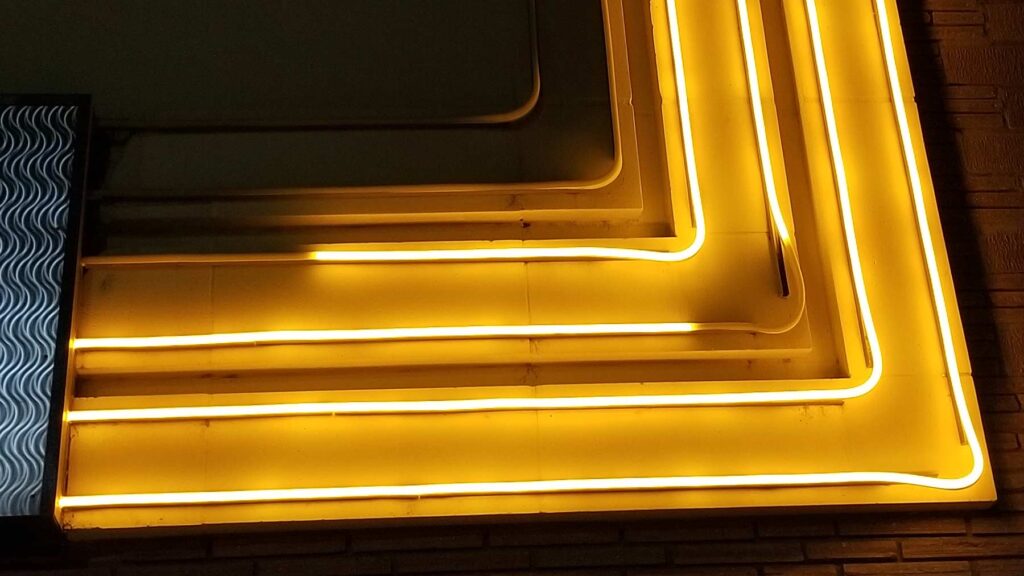
Ok – some projects take longer than I expect – that’s a given. I generally end up getting more detailed and add more work to my design (which is always subject to change). But THIS project – WOW – this took me a LOT longer than I envisioned. Through a combination of setbacks and bad advice, this project took a couple of months. If the stars had aligned properly, it could have been done in a little over a week.
Let’s go back to January, 2023 when I was approached by the Arts Council of Thayer County to create a proposal. Through a long series of discussions which revolved around what grant would be best for what part of the project (neon and reader boards, or just neon), it was finally approved for purchase in January 2025. Once I had approval and a down payment, I could order the lights, which were coming from China and start this ‘bright idea’ 😀
The old lights had been up for about 10 years and were starting to fade, fall down, and generally not give a good look to our local theatre. They were solid yellow LEDs, and the lights in the letters were white with yellow vinyl over the plastic covers.
Here’s a look at the previous lights in a photo taken in 2015 shortly after they were installed on the left, and the lights as they were in 2025 just before we removed them (right).
After some VERY careful measuring and research to find the perfect programmable LED strip for this application, I placed an order for commercial-grade, RGB neon. My goal was to replace the long lights on the sides with long single strips, and then set up 2 rows of LEDs inside each ‘can’ for the letters.
The first problem arose when I unpacked the lights – they sent the side lights in 2 pieces per line – one for the horizontal run and one for the vertical run… it was supposed to arrive in one long piece. ARGH! Early in spring when this was happening, I was penciled in to be out of the country for 3 months on a project starting in May – so I had to decide if I wanted China to replace the lights with what I had ordered, or work with what they sent. The 2-month turnaround time forced me to work with the lines they sent, so I spent about a week soldering the corners together (very small solders!)
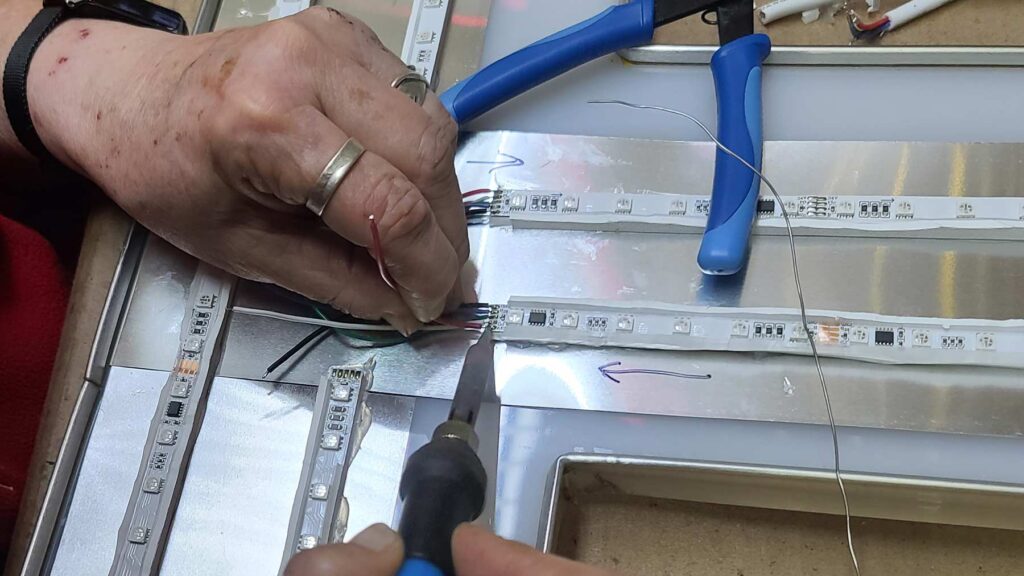
The photo above shows me soldering some of the strips to create the lights for a “T” in the channel letters. I had to do this on the 12 corners of the long strips and then do my best to lock them in place and hold them while I protected the corners in silicone.
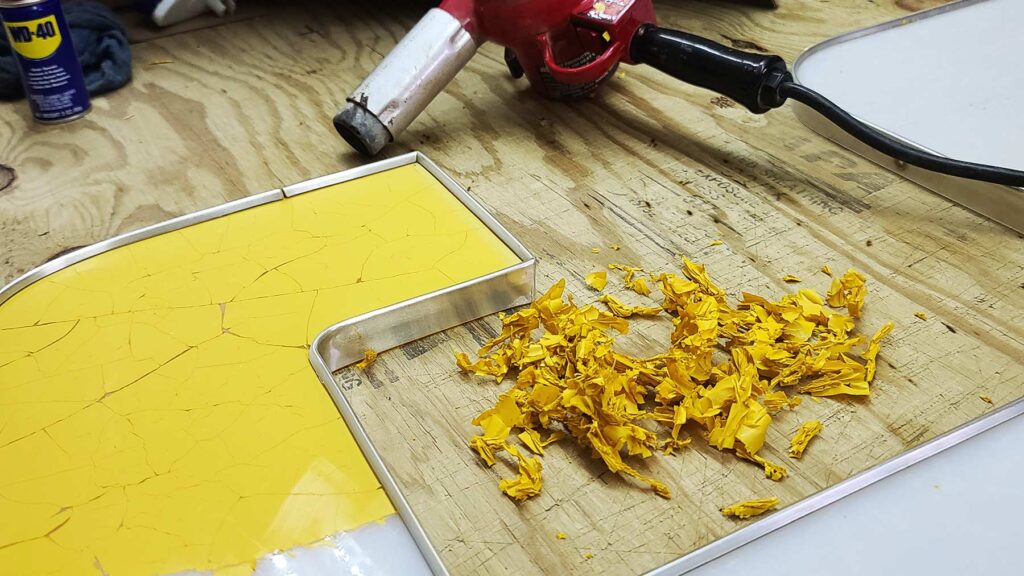
Because the faces of the letters needed to be transparent white for the colored LEDs to shine through, we had to remove the yellow vinyl from the plastic letters. This went well on the letters that came from the north side – but the west side (exposed to the sun more) was dry, brittle, and came off in 1000s of tiny pieces! (…I left those for Art to do.)
With the lines ready and letters cleaned, it was time for installation! We got started on April 25th. THANKFULLY, a local contractor – Randy Hissong (my hero!) saw us up on scaffolding taking down the old lights and offered us use of his scissor lift to get the new lights up. Over the course of the project, he was extremely accommodating as we needed it much more than originally planned. Brian always volunteers to help with all of my crazy ‘up in the air’ projects, and he was invaluable with this one!
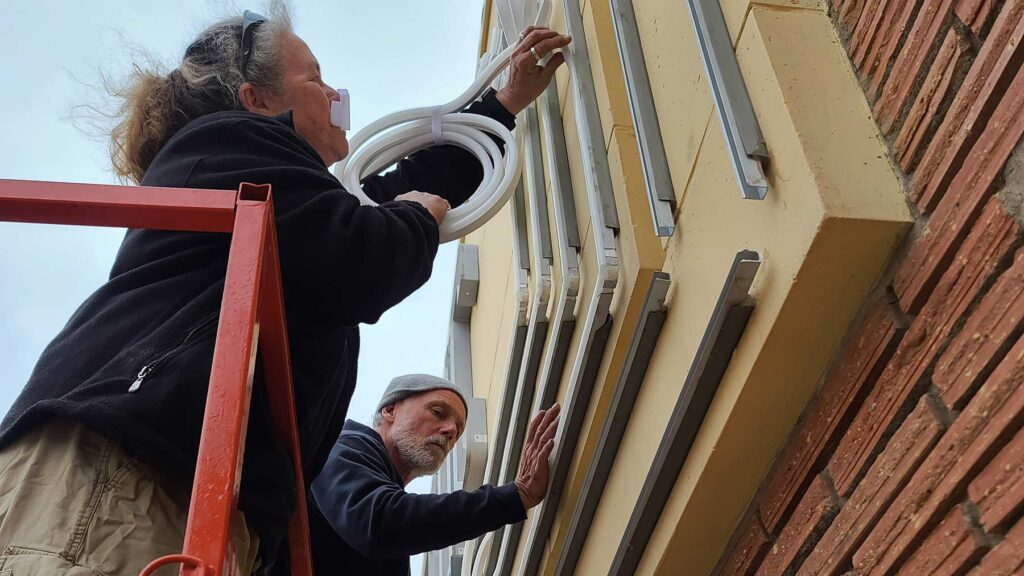
The new strips went in quite easily. They came with aluminum channels, which fit perfectly into the existing channel from the old neon. It was tight, but a great fit!
As we installed the lines, we noticed that a couple of the lines were too long and a couple of them were too short! OOPS! Seems I didn’t mark them correctly! 😳 So we swapped out the lines and got them into the correct order.
I also had a lot of wiring to do on the inside. There is a long corridor behind the walls that the lights are mounted on, so I worked in there for a few days getting my wiring in place, but temporarily, until it was confirmed that everything was working properly.
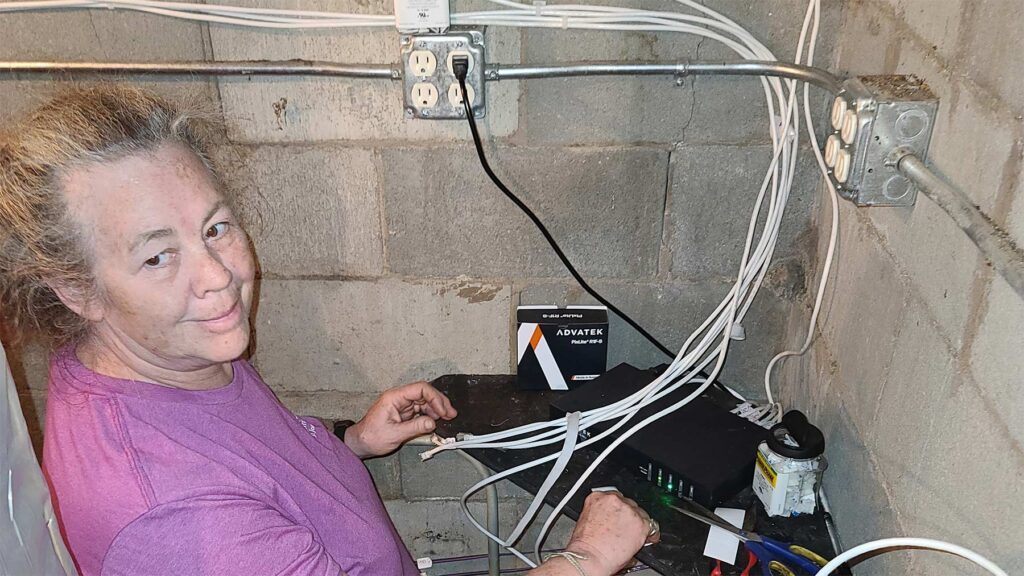
With LEDs pre-tested and installed, I needed to control them and the controller that I was told that I needed was not the correct one. With all of the other issues with the lights, I was even shorter on time now – I ended up replacing the $800 controller with a $3000 controller that ALSO didn’t do what I wanted it to do. I ordered this controller from a lighting specialist in Vegas because I thought that I’d have it in 3 days, but it turned out that it had to come from Australia and took 10 days, then when it arrived, it would only control half of the LEDs! So I had to wait another 10 days to get additional parts!
…maybe I shouldn’t always listen to the experts 😉.
In the end, it is a much better controller, but there is a lot less online information about how it works with the software that I am using.
So we got the wiring done, got the lights in, and ran our first test. WOW! They look great – in the places they’re working! 😭 It turns out that the lines we replaced were damaged in the transfer to their correct spots. We were gentle with them – but apparently, not gentle enough. I got everything working well enough to ‘pass inspection’ and then started working to make permanent fixes to them.
So again, I was up against my schedule and now had to decide if I would fix the damaged lights or order replacements from China. With the strong possibility that I would be out of the country, I couldn’t wait the 2 months for replacements, so I set about fixing the broken lines. This involved micro-soldering the LED strips and replacing the broken ones with new ones (I had some spares!).
I did this for about 2 weeks, and during that time, I learned 2 things. Repairing multiple damaged LEDs in a long line is a hopeless endeavor. I also learned my other project was pushed back to the fall. With this new knowledge, I ordered replacement lines from China. In the meantime, I set about finishing up the programming, installation, and wiring of the LEDs that I had working.
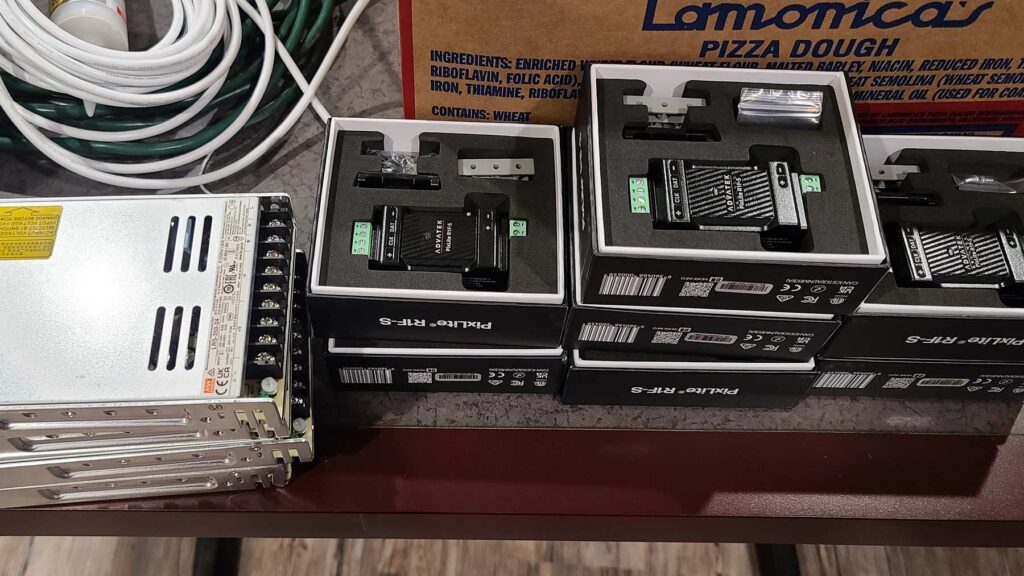
Now that I was getting serious about programming the lights, I found that I had a MAJOR issue! I should be able to control each and every pixel as I choose (this is called addressing the pixels). I found that some areas were perfect and others were not doing what I expected them to do. For some reason, I couldn’t ‘address’ these problem LEDs properly.
I made several calls to my supplier in China and the tech support crew of the controller in Australia. Sometimes I had to get an answer from one and relay it to the other. Thankfully, I keep weird hours that work well for international tech support! I worked through this for almost a month.
So… when I was first installing the lights, I was told that of the 5 wires, the ‘white’ wire was not needed. I only needed to connect the 2 data wires, the power, and the ground. So that’s what I did (listen to the pros, and not short anything out). As I started to troubleshoot, I asked MANY times, “Are you SURE I don’t need to connect the white wires?”. Each time, I was assured that “No, you don’t need it”… “But doesn’t the white wire address the LEDs?” …”No, you don’t need to attach the white wire”
I think you know where this story is going…
Eventually, I told the Chinese supplier, “I think that you are wrong and I am going to connect all of the white wires and see if this fixes my addressing problem”. So that took almost a week to connect everything.
And after the fact, they got back to me and said, “Yes, you need to use the white wire between the fixtures”. Gee – thanks!
So with the oh-so-special-white-wires connected inside and out, I was FINALLY able to start addressing all of the lights the way I should have originally! Soon after, the replacement neon arrived from China and we installed them without incident.
Of course, there were more little problems along the way and they were all overcome, and eventually I got everything up and programmed the way that I had envisioned!
On July 2nd, at about 11pm I had completed my fixes and was putting the cover of the “M” back on. I had a show running for the past 90 minutes and it was FLAWLESS! And I was ready to go home!
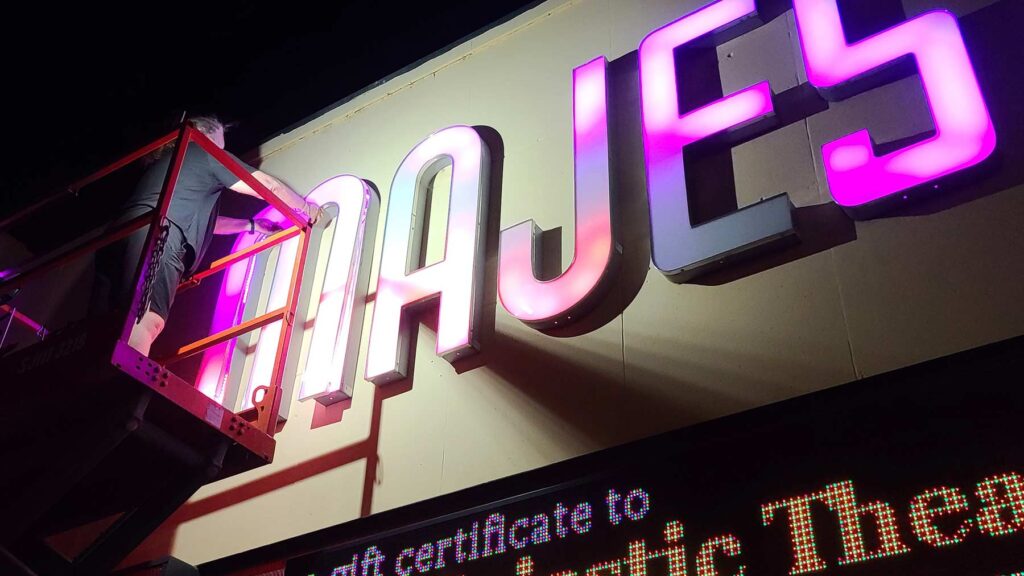
I lowered the lift and was ready to bask in glory! I got to the ground, and Art told me, “I didn’t want to tell you while you were up in the air, but Right Line #5 is glitchy”. ARGH!
It was running great, and now it decides that I’m not done yet. So we decided that Right Line #5 needed to come down so I could look at it and hopefully fix it (remember what happened the last time that I had to take neon lines down?). It was glitchy starting at the bend (that bend that I shouldn’t have had to join if they had sent what I ordered), so I knew where to look.
We started testing Line #5, and I was working on programming and addressing it, but Line #3 was lighting up!?! It seems that Art mislabeled the 3 and 5 connectors when he wired them up. No worries – back to line 5 and nothing worked to get it going.
I moved the lift from the north side to the west side and started CAREFULLY pulling line 5. So up I go, and get it pulled almost to the end- when I realized I pulled Line #4 ARGH!! 🤣 So I get Line #4 put back up where it belongs, very gently pull 5 down, and take it inside.
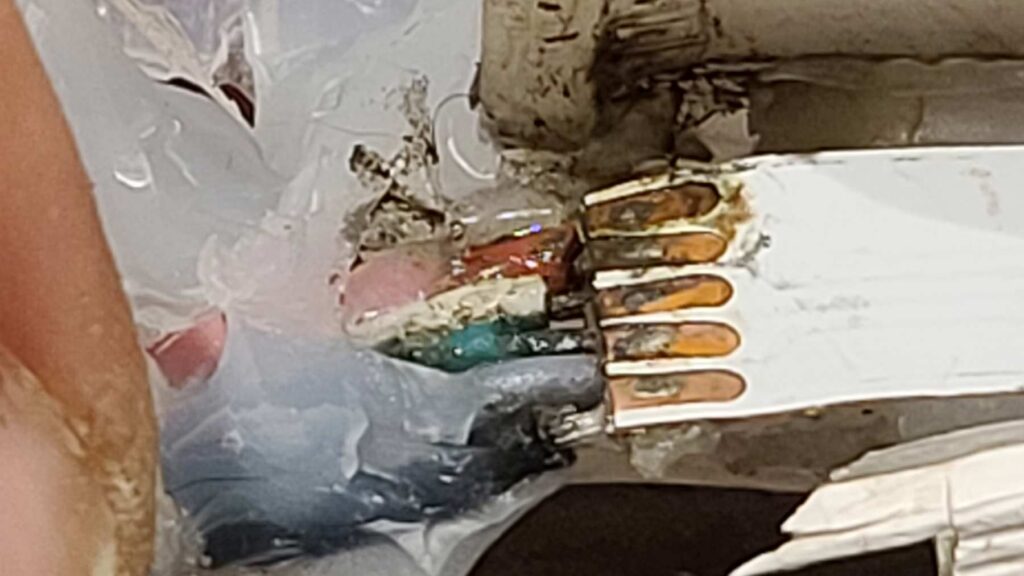
It turns out that moisture got inside past the silicone and shorted out the connection. ARGH!
I replaced the pixel and covered it with new silicone and let it sit for over an hour. The whole time it was on and working perfectly. We took it back outside and CAREFULLY installed it.
I powered everything back up and ran a test – and got the same glitchy results! ARGH! I really wanted to have a premiere the next night with the outdoor movie that was showing. So now my choice was to take it down and fix it (again) – or just let it roll.
Art suggested I pull the corner out (where the trouble spot was) and jiggle it. Sure enough! It worked! 😀 I pushed it back and it got glitchy again. So I pulled it out about an inch, it worked, and I slowly backed away. That’s a fix for another day.
So, despite several setbacks, the lights look GREAT and I can program them to do anything!
Special thanks to Brian Petersen, Art Whitton, and Randy Hissong for their invaluable help with this project!
As well as the ACT Board for their patience and support in trusting my vision.
Here is more video of some of the ‘shows’ I’ve programmed.

