

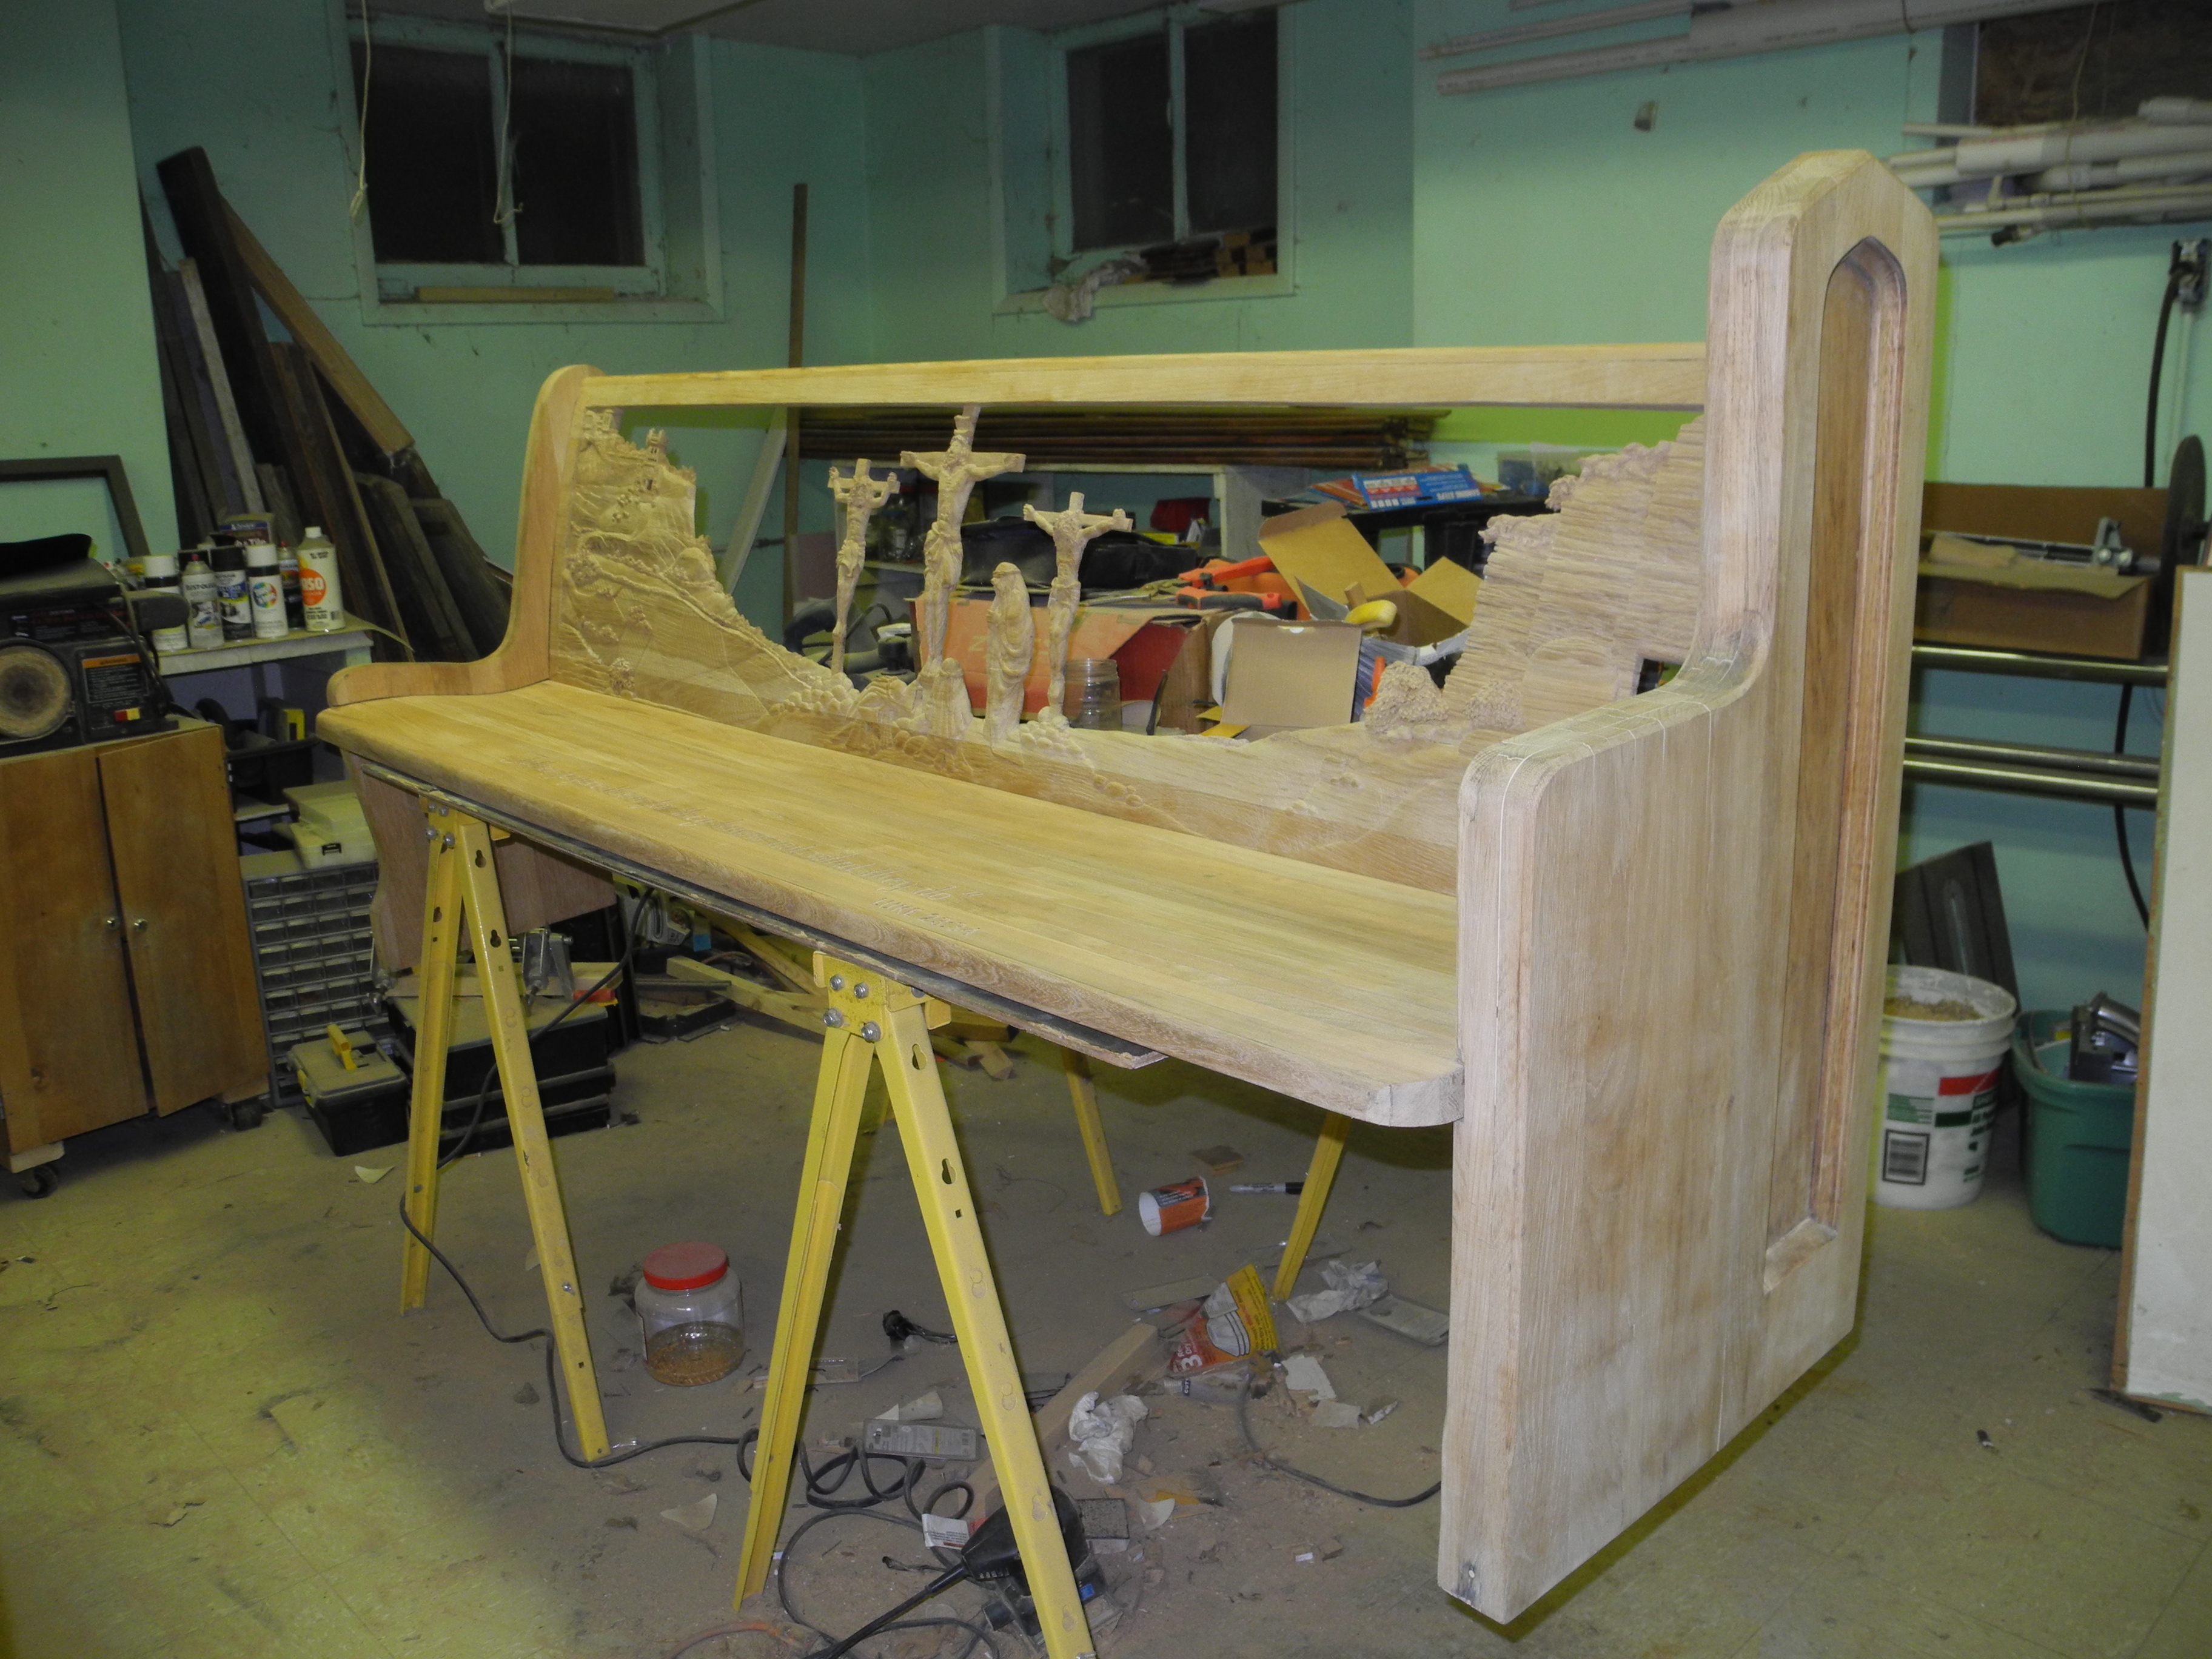
One of the great things about living in Nebraska is the number of auctions in the area. I’m constantly picking up items that I ‘might’ see a need for in the future. I don’t always know what it will be, but some things I just have to buy. A couple of years ago I bought 3 oak church pews. At the time I had no plans for them, but they were affordable and we had room in the truck!
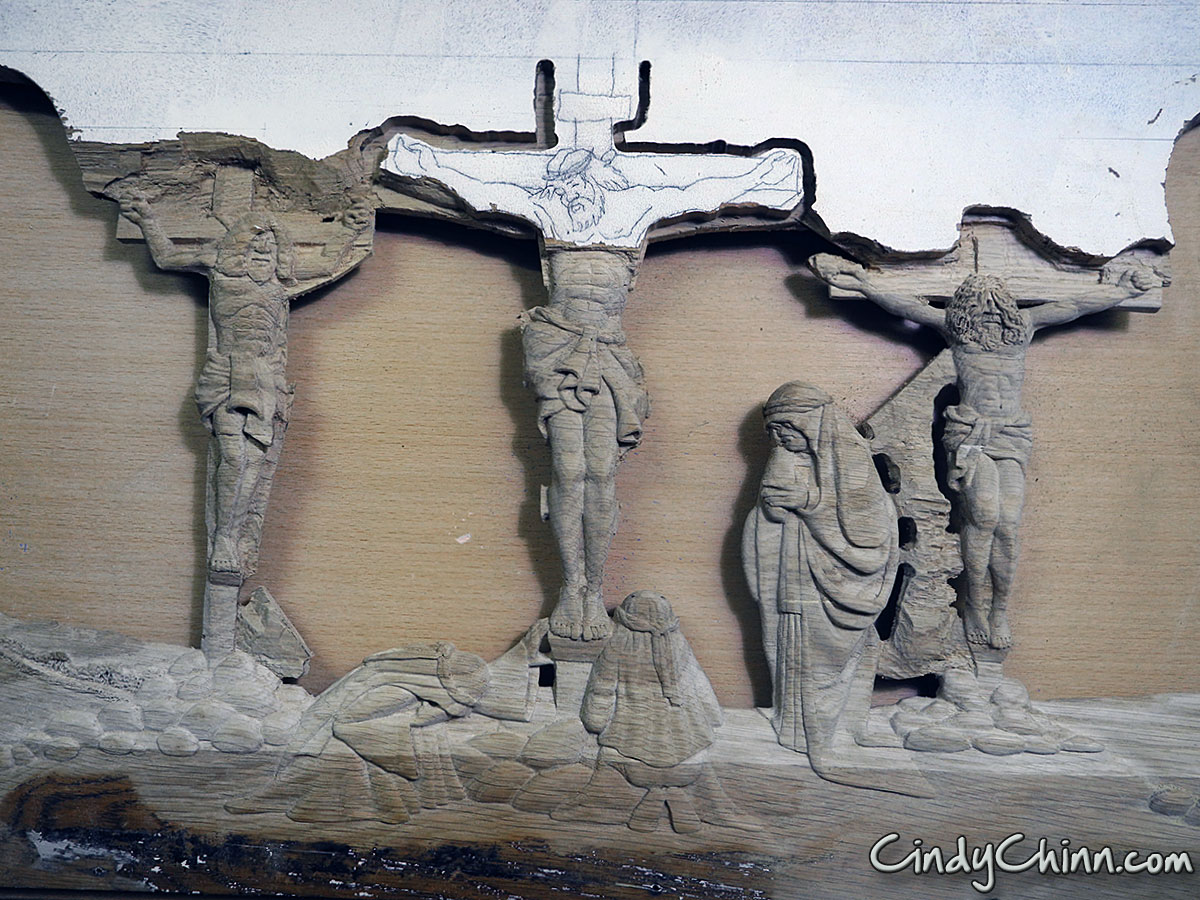
A year later I designed one to have the last supper carved (or sandblasted) on the back. I started it, but moved onto more pressing projects. I wanted to pick that project back up so this month I began work on another bench. I haven’t carved any wood in 25 years so I thought that I would do something with less detail. Keeping with the biblical theme I chose to do a crucifixion scene.
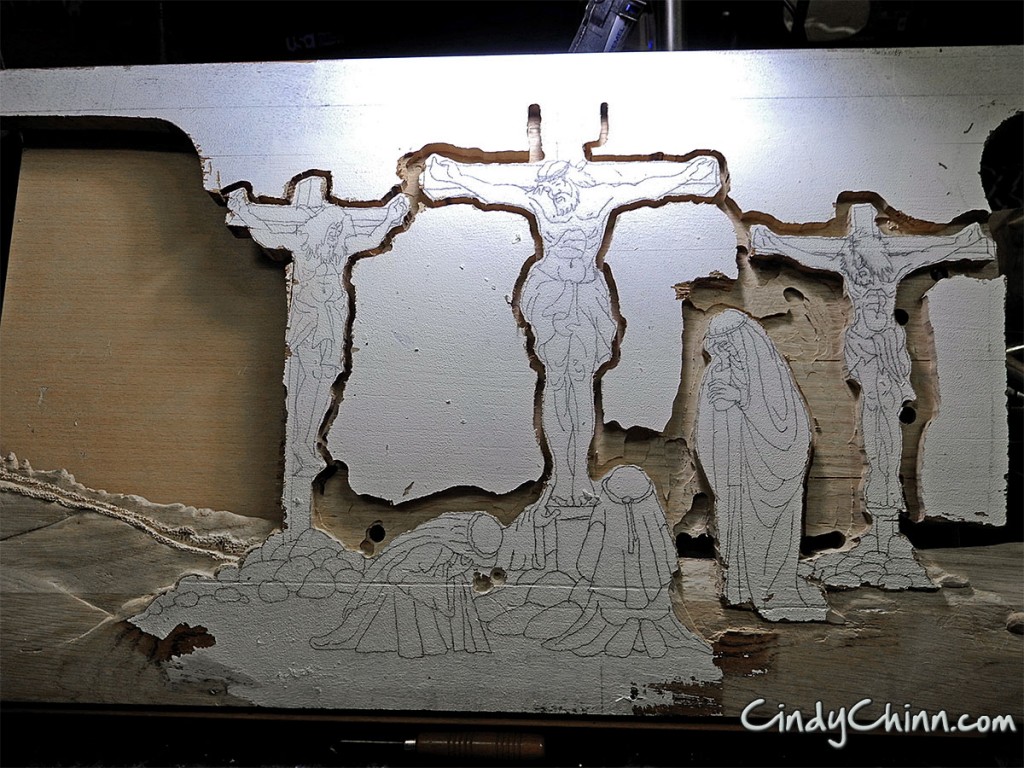
Another great thing about Nebraska is our long winters! I decided to start carving in the new year to while away the cold days. I started with a sketch and then transferred it to the back of the pew after taking it apart to make it easier to handle.

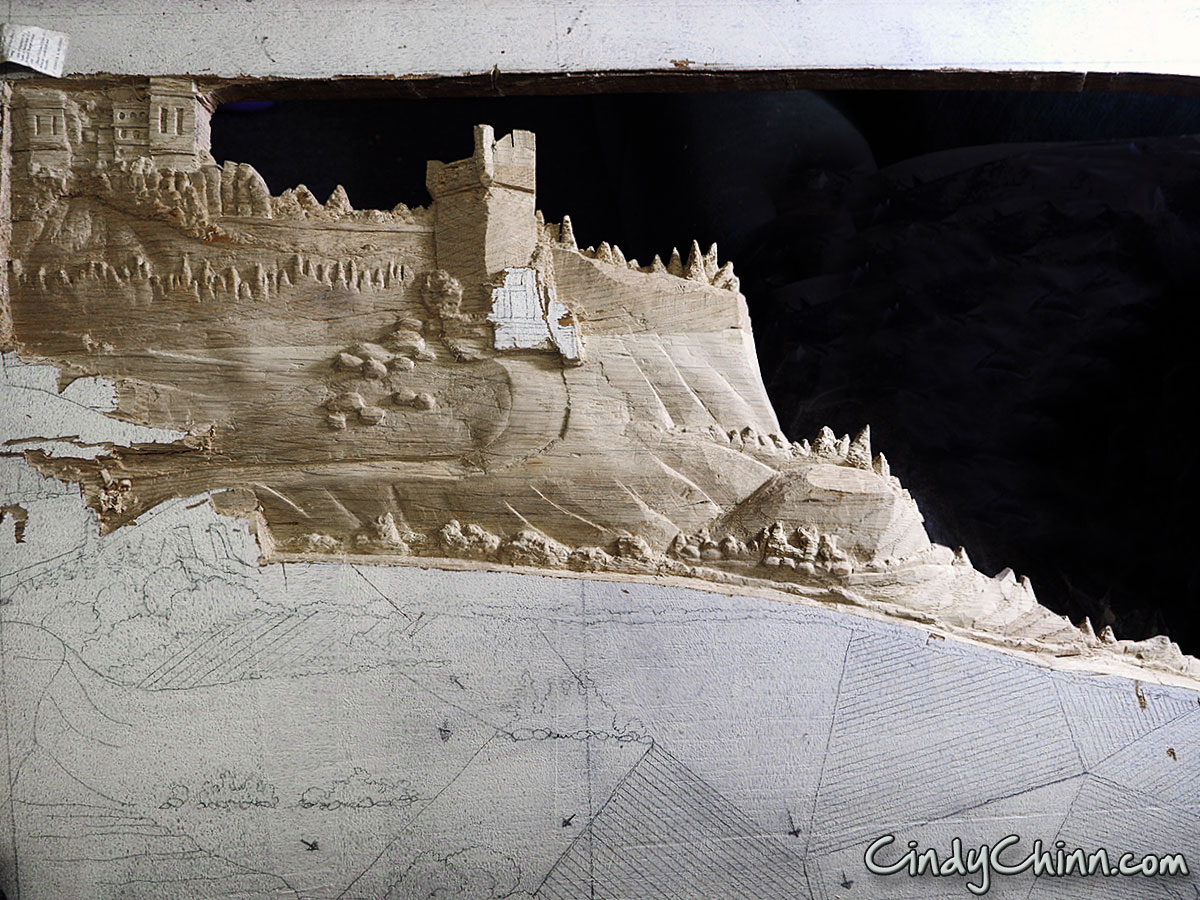
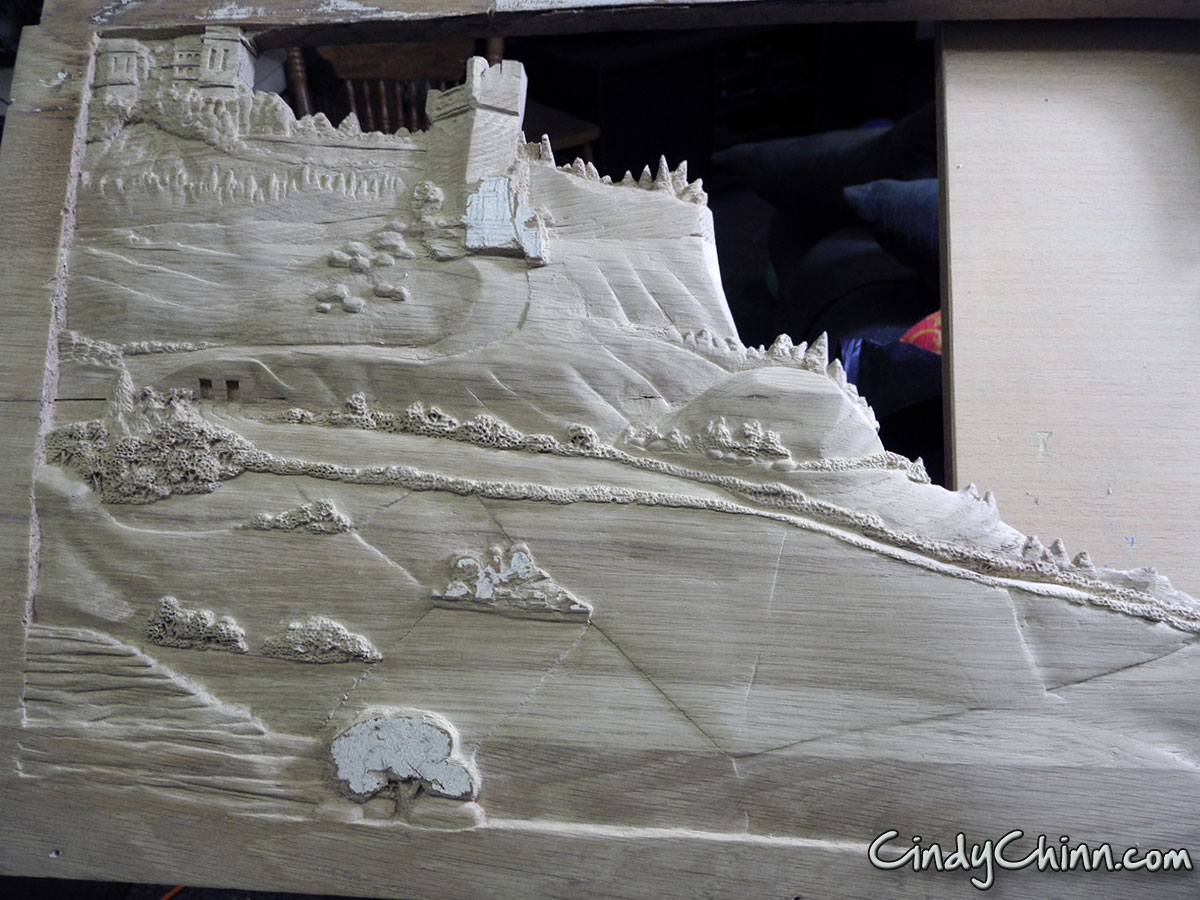
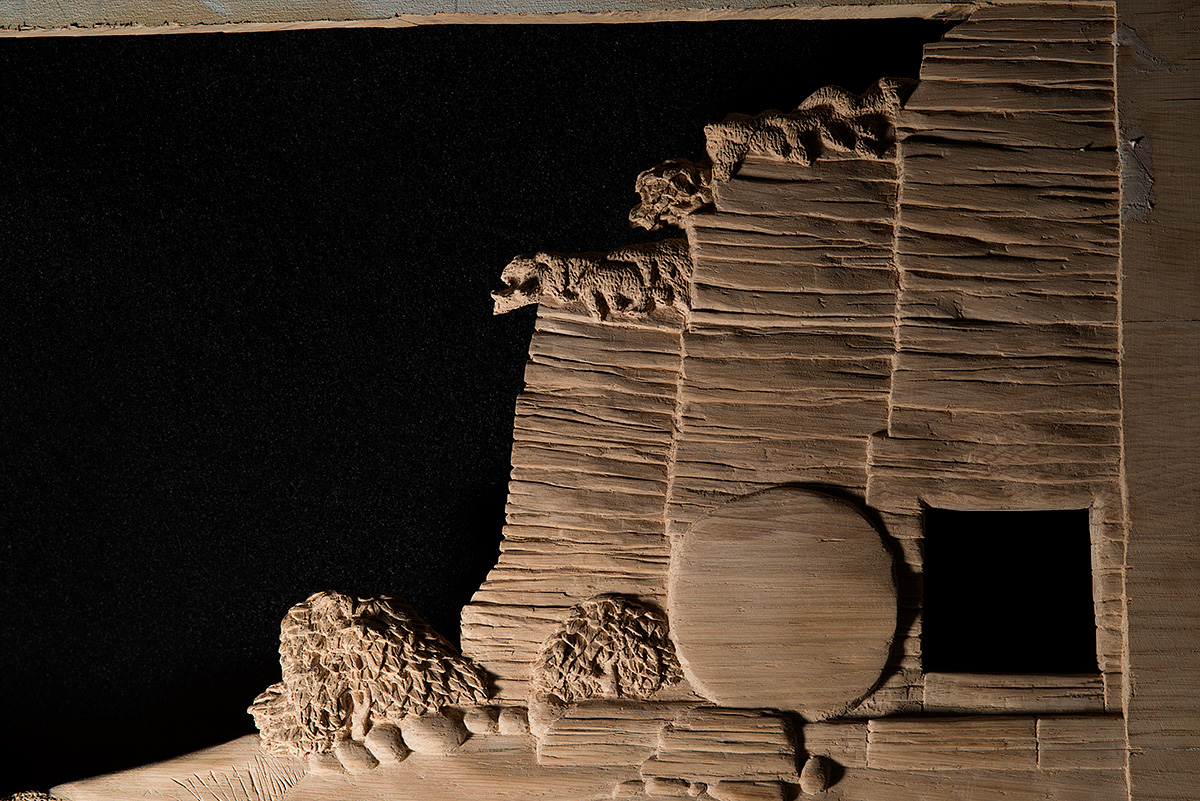
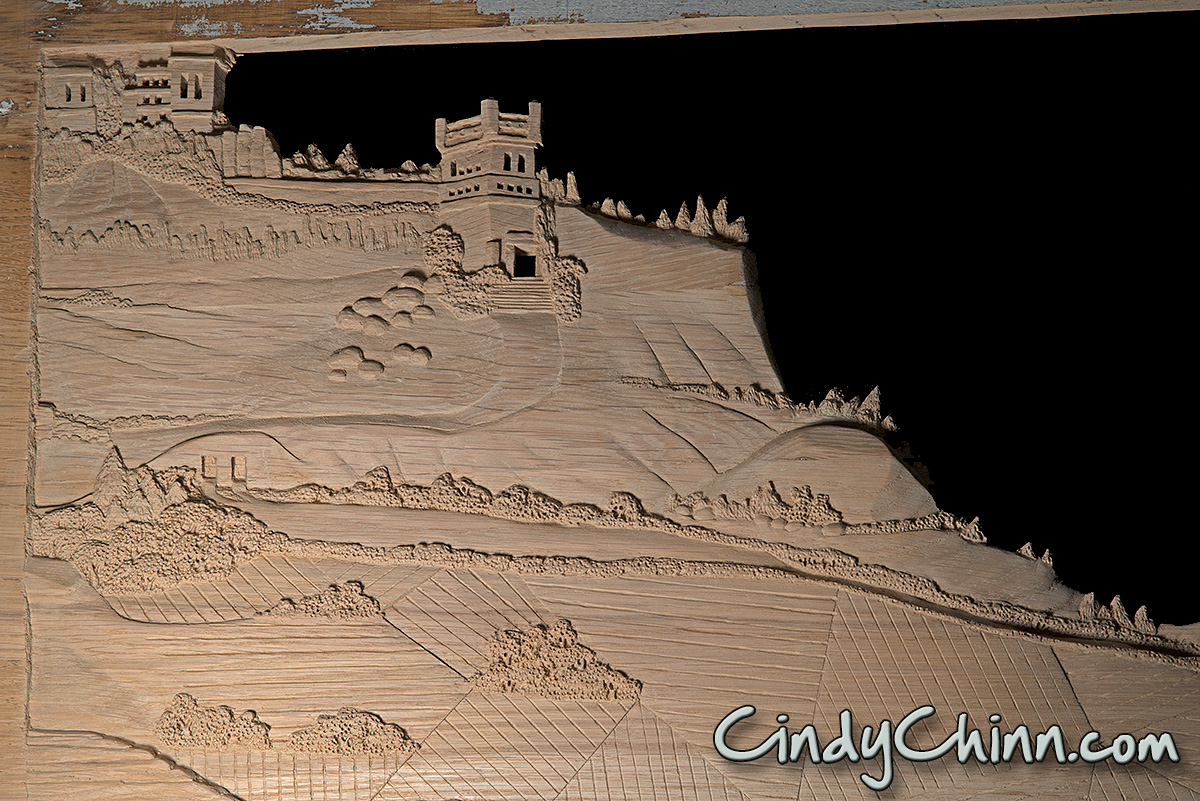
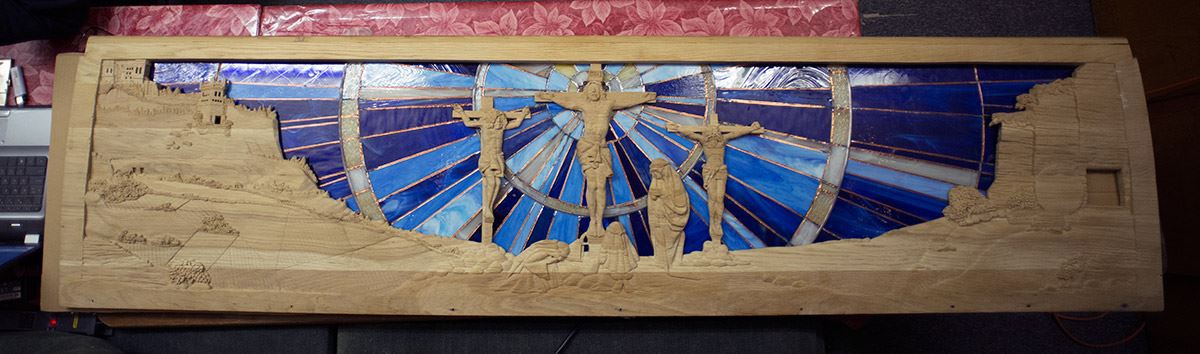
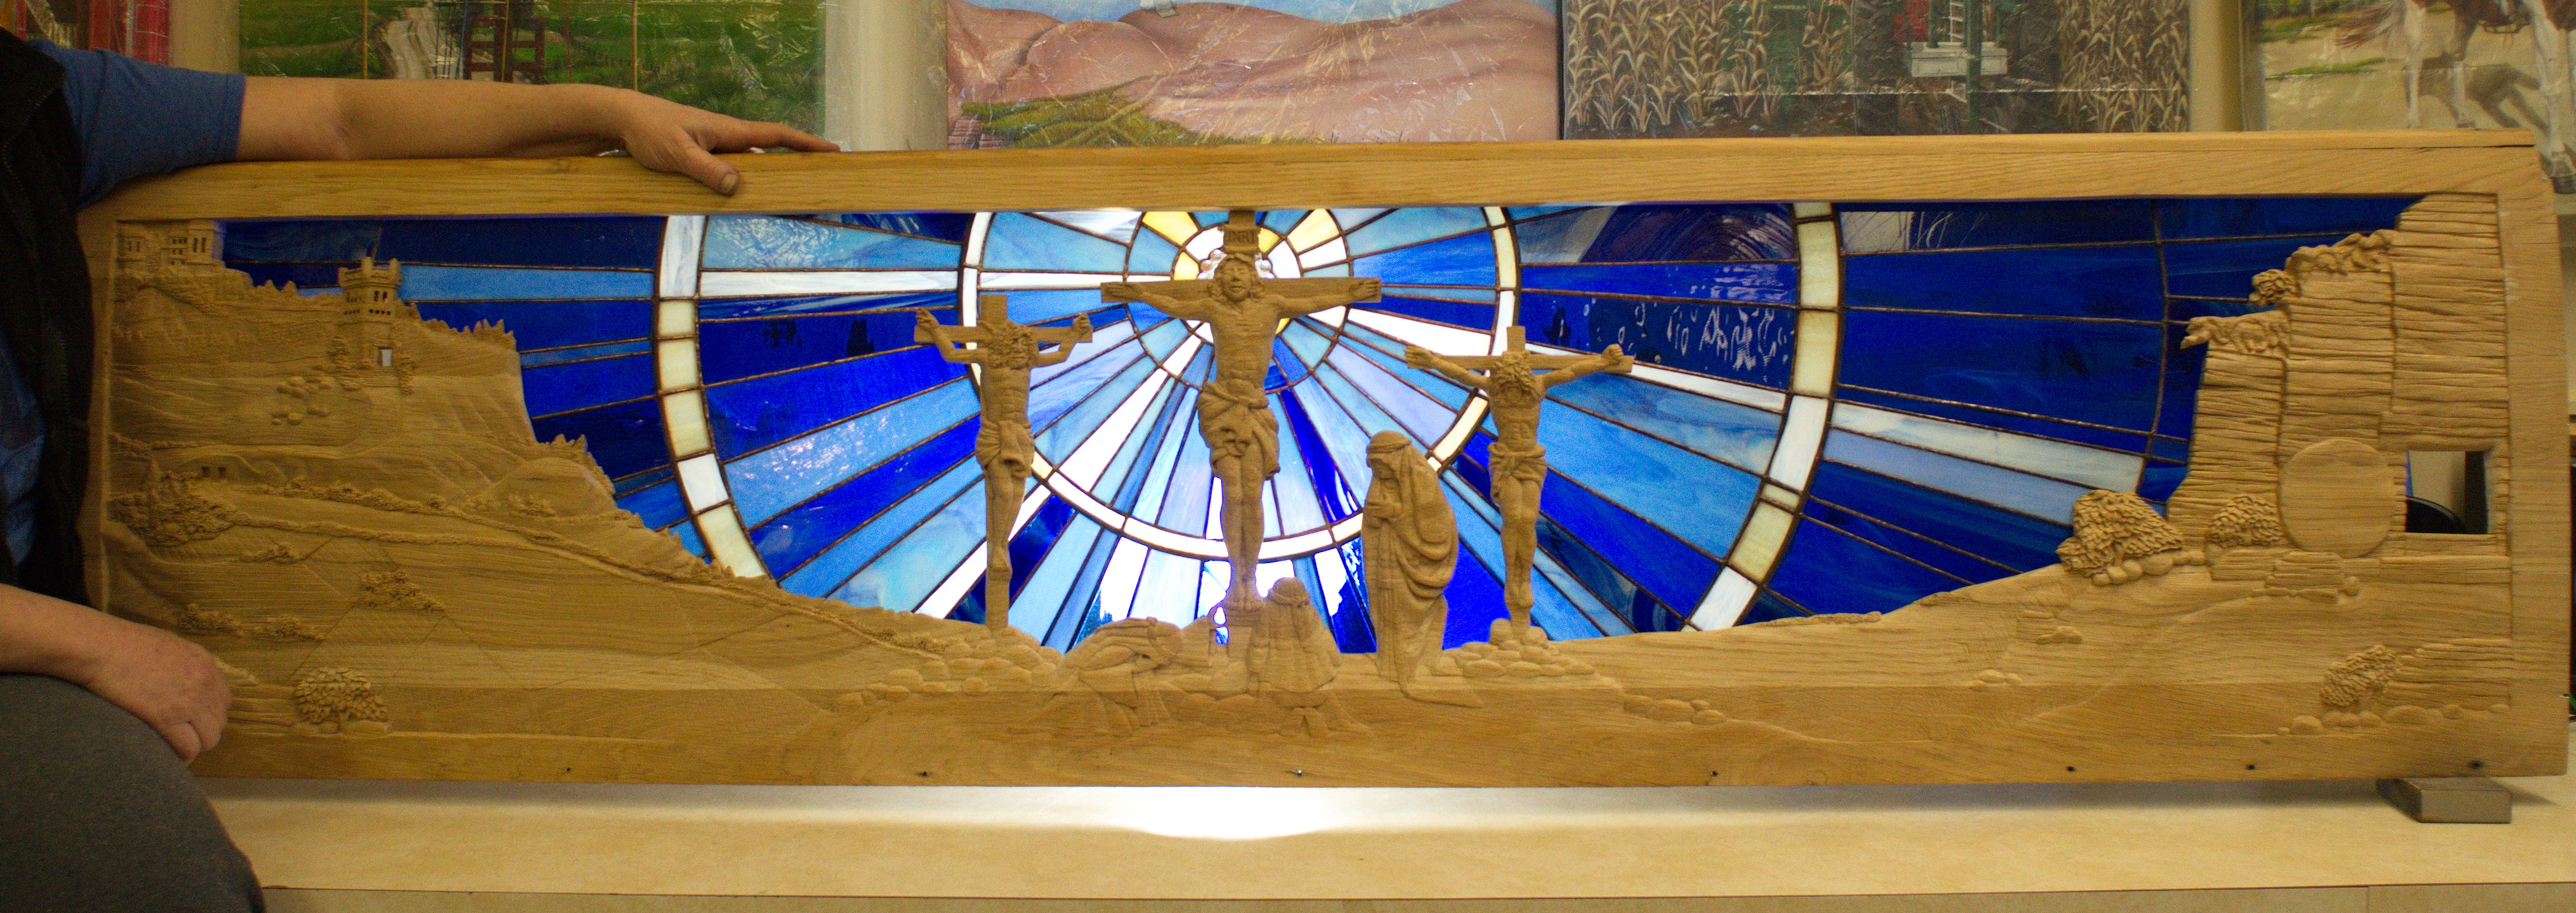
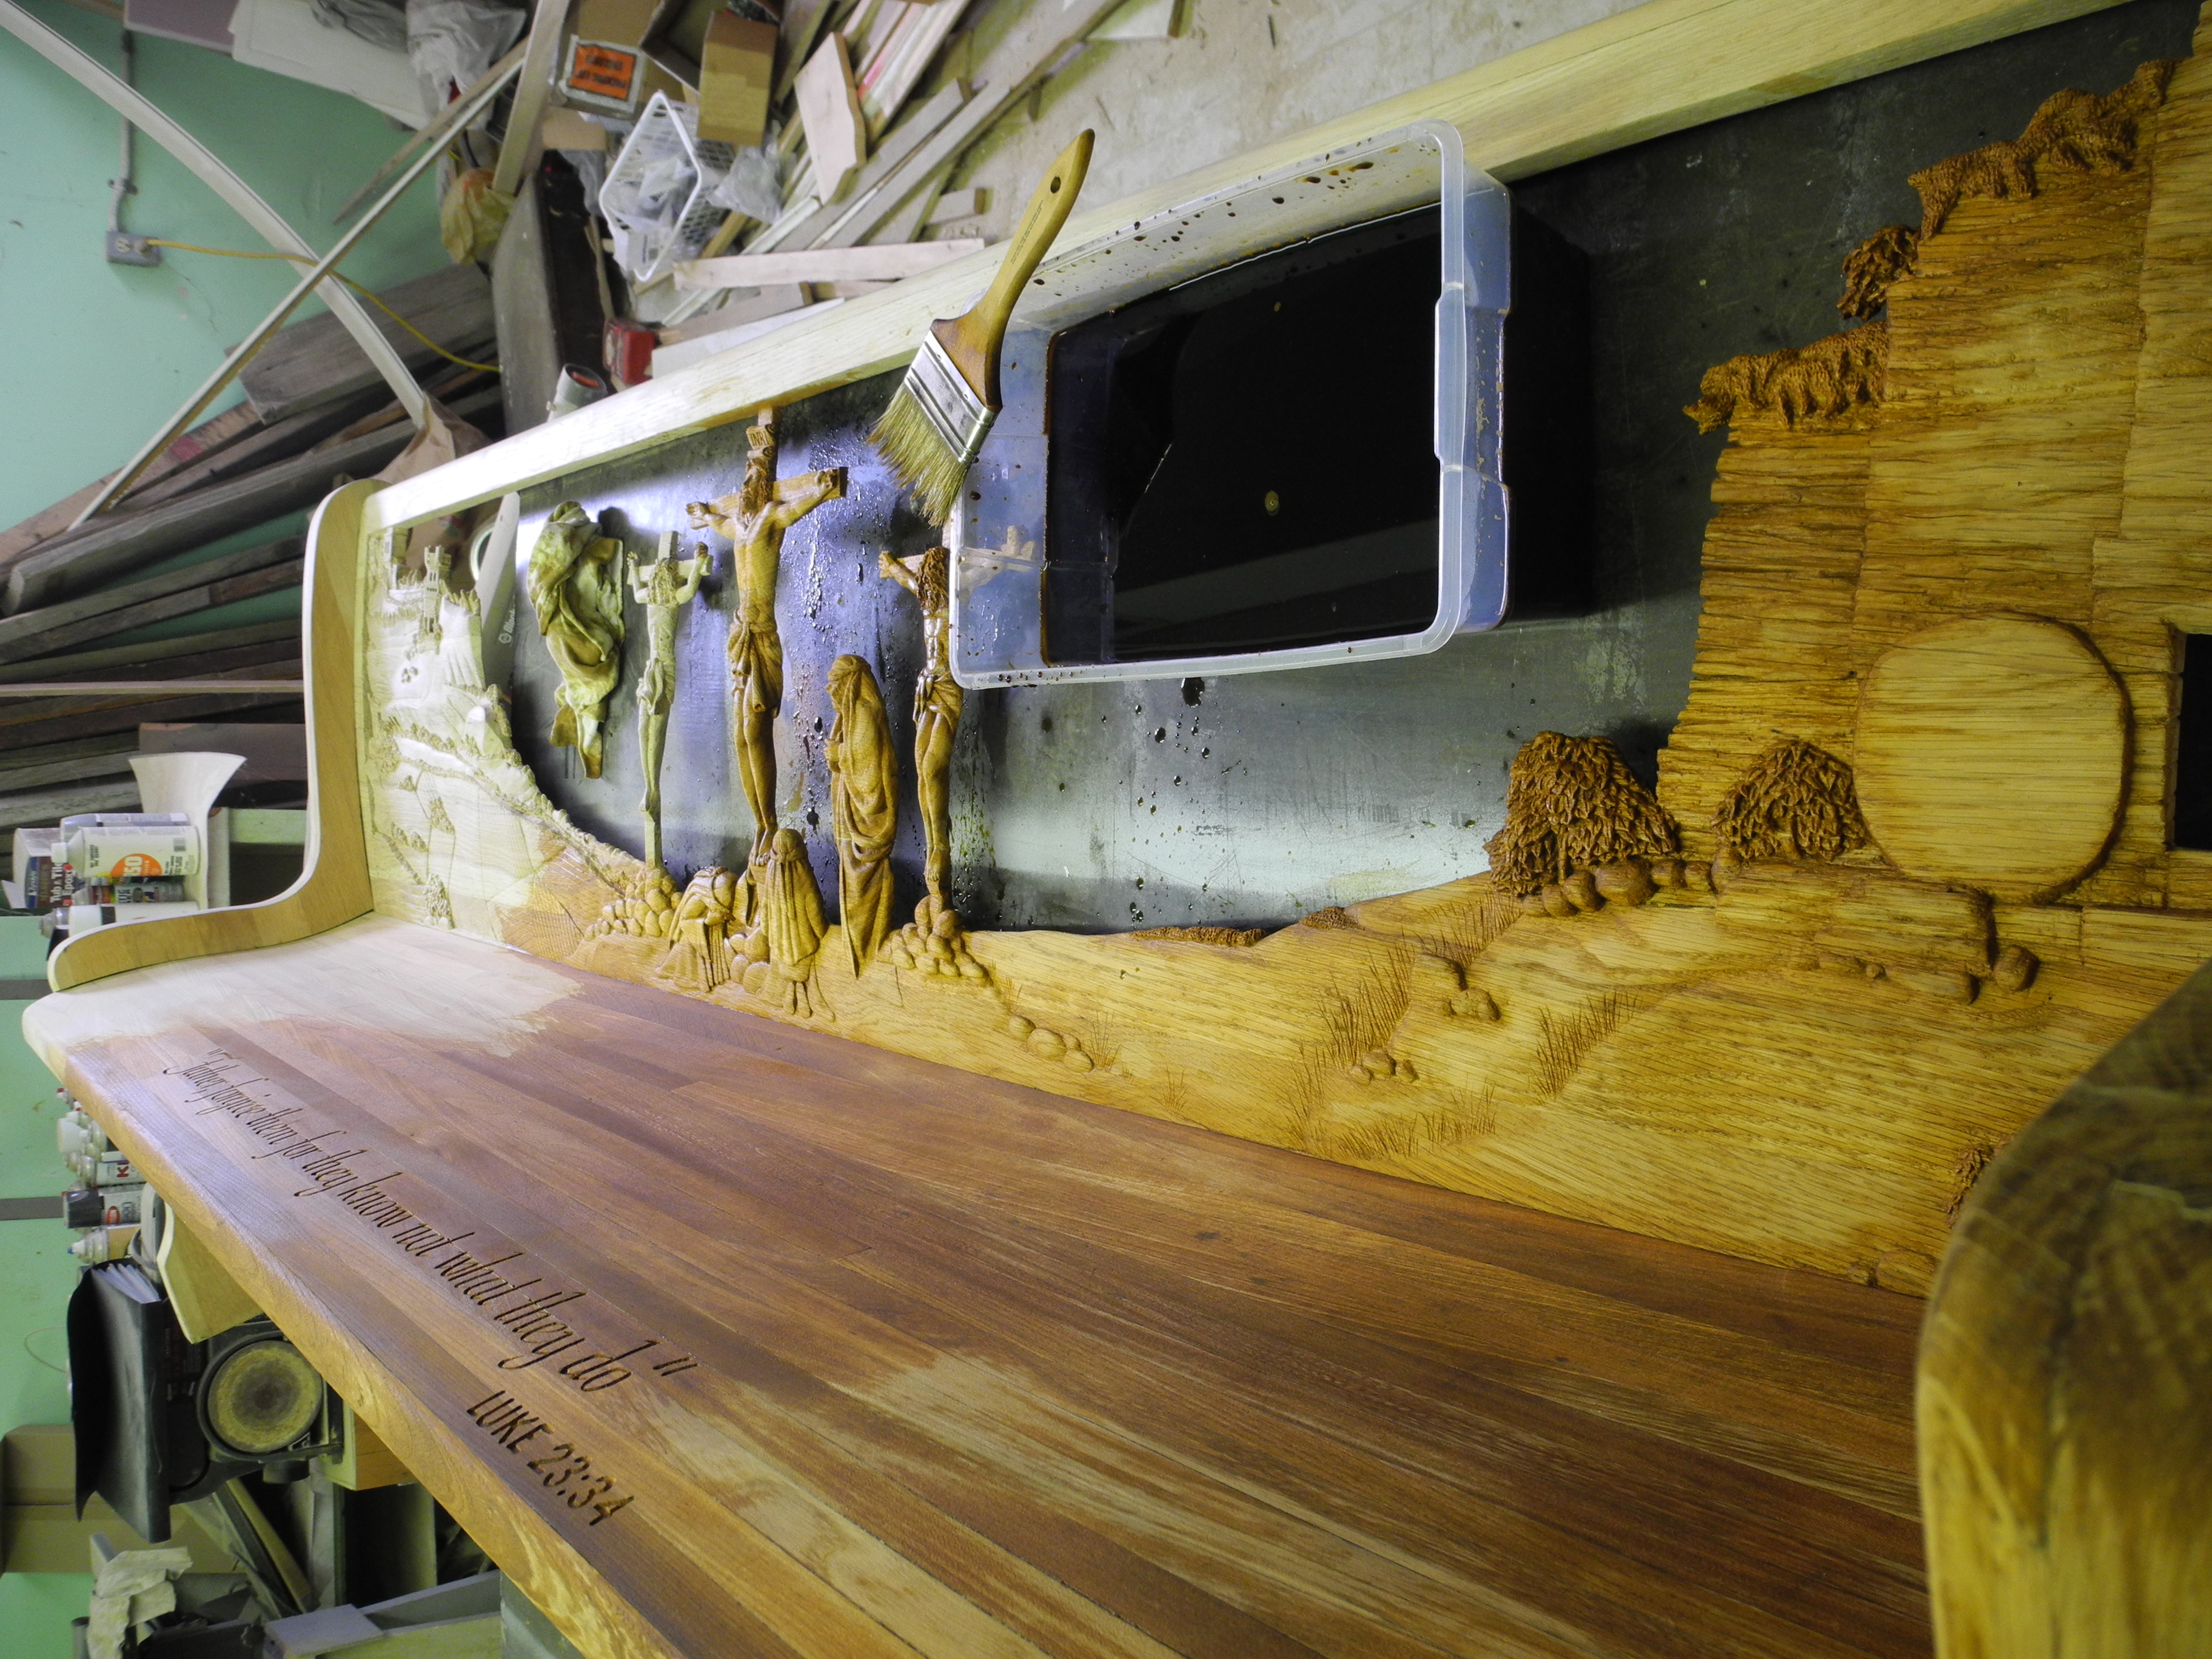
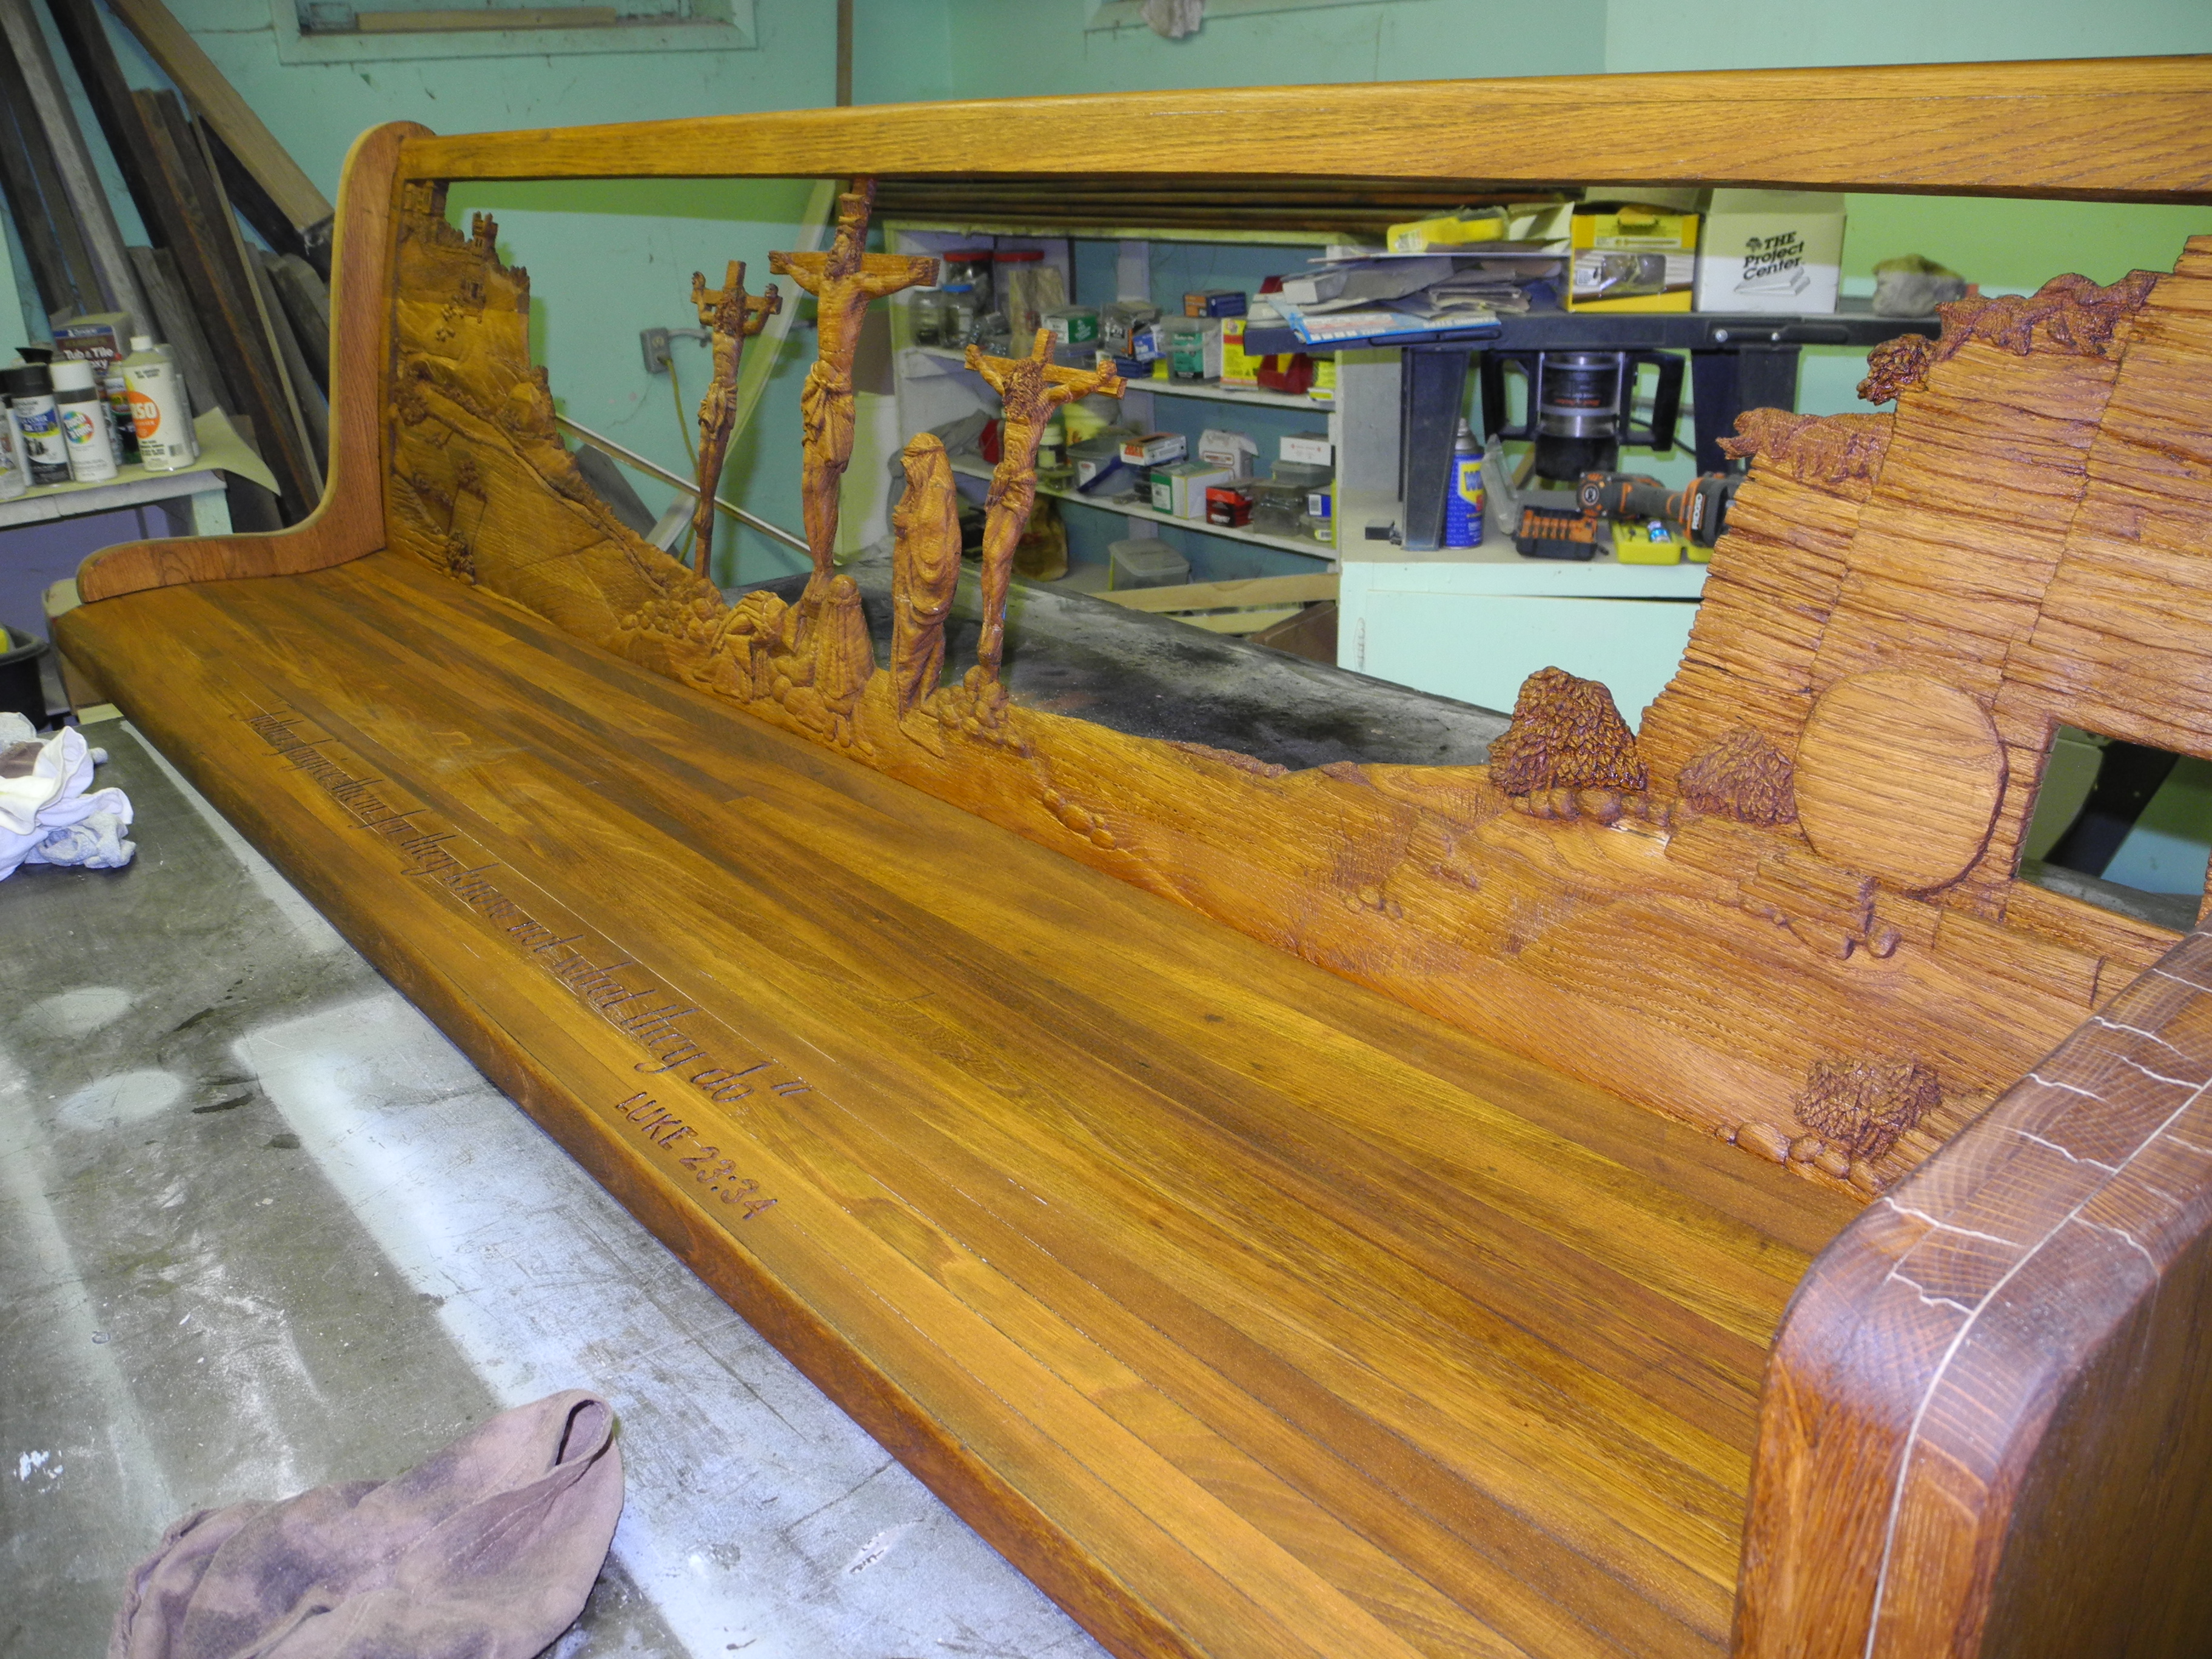
On the left is the town of Jerusalem where Christ’s trial was. I have a path leading out of town and to Golgotha where Christ and two others were crucified. I included 3 mourners in the scene as well. On the right side is the empty tomb where Christ will be placed.
I plan to hand carve most of the scene using palm chisels and gouges then cut away the background so that I can add back-lit stain glass behind the wood. I began on what I thought would be the simplest area to carve, the tomb area.
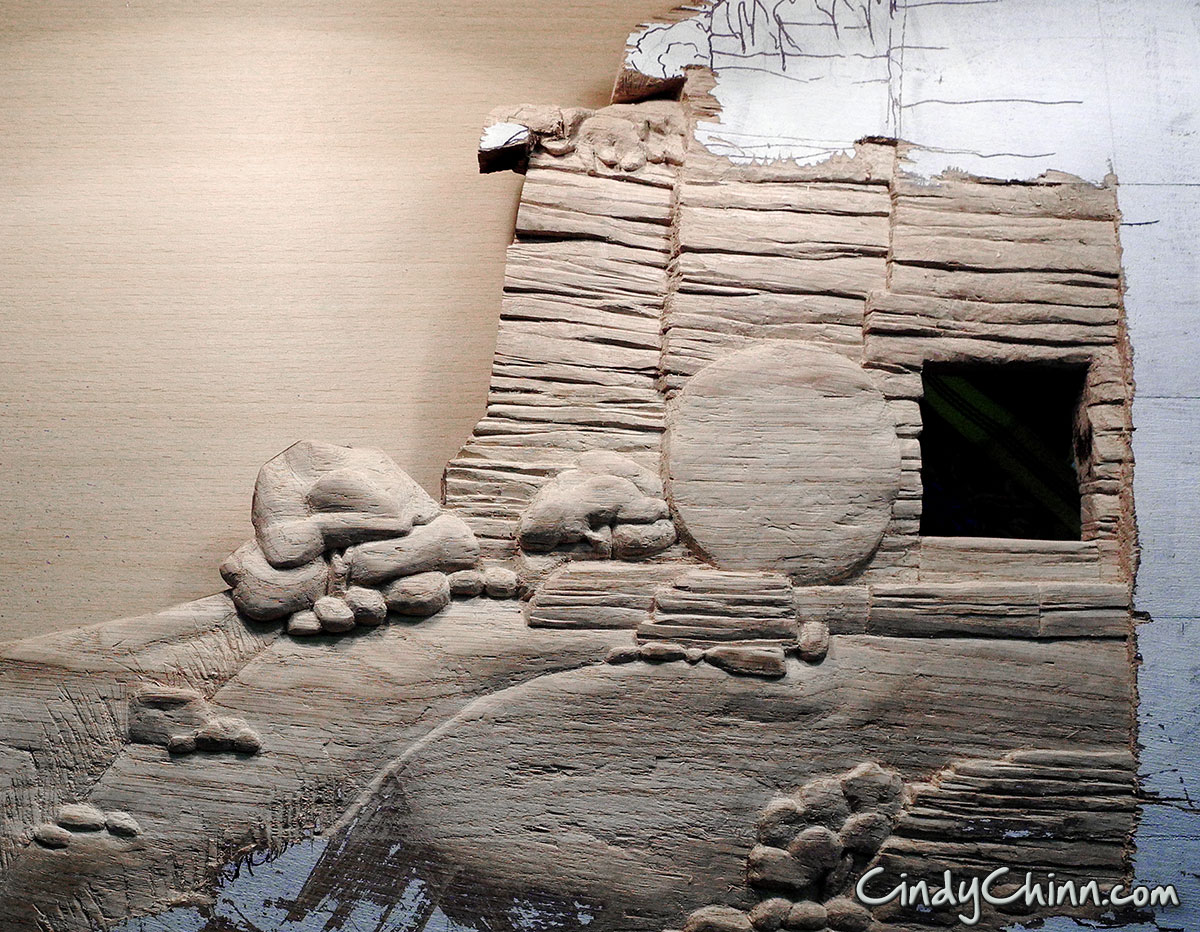
The above image shows the tomb area roughly carved out and with the background removed. I still have a lot of finishing on this to do.
The next area to carve was the town of Jerusalem. This area had the buildings and a lot of foliage. I used a Dremel tool only to get some of the detail on the shrubs and reach tight places.
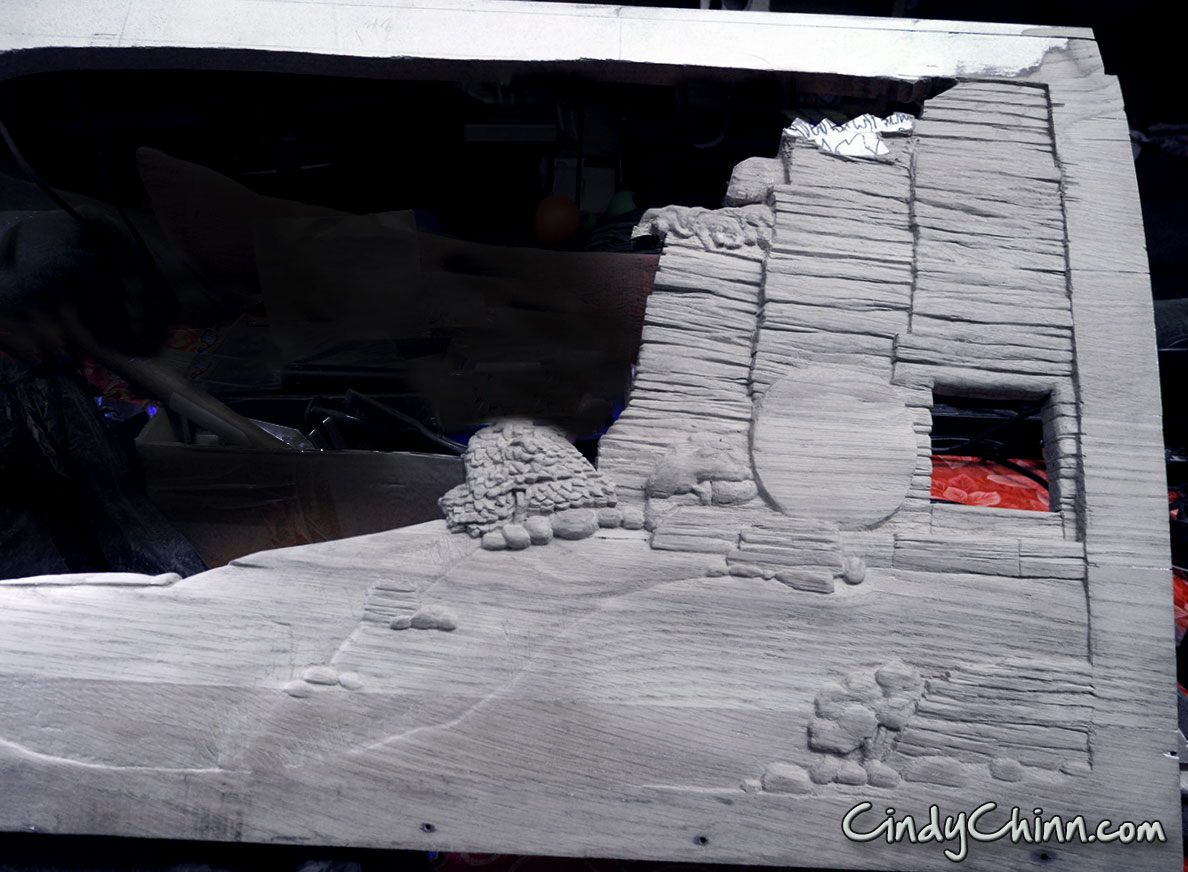
Now it was time to work on the central part of the design. I took the wood to my workshop and cut away a lot of the background, but left some wood around the crosses for support while I carved. This area had the most detail and I’m really glad that I refreshed my carving skills with sides first.
It’s starting to come together and I’m having fun with the detail now! Now to move back to the tomb area and add more detail:
Now that things are moving along I feel confident enough to start on the figures. I’ll begin with the standing mourner, Mary, the Mother of Jesus.
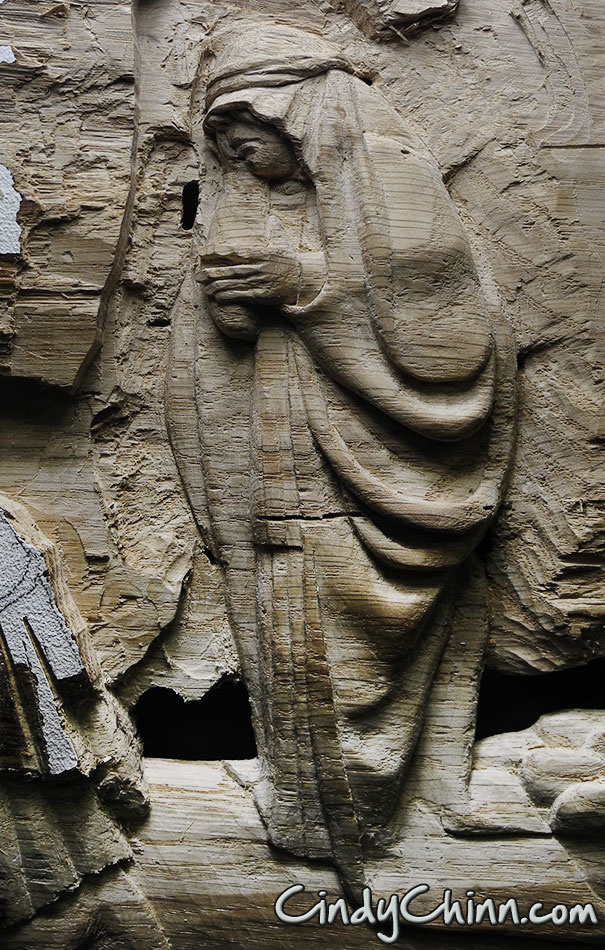
This was a daunting task to translate the 2D image into 3D using a 3/4″ depth. and I found that getting the flow of the robes a bit of a challenge when if came to figuring how deep each fold went and what plane everything should be on. I am also dealing with some cracks and the tongue and groove wood used to make the pew, they weren’t glued together.
Still I’m very happy with where I am at this point and will carry on with the rest of figures and add a little more detail and finishing touches as I move across the bottom of the scene.
Below are the 3 mourners roughed in and ready for sanding and some more detail:
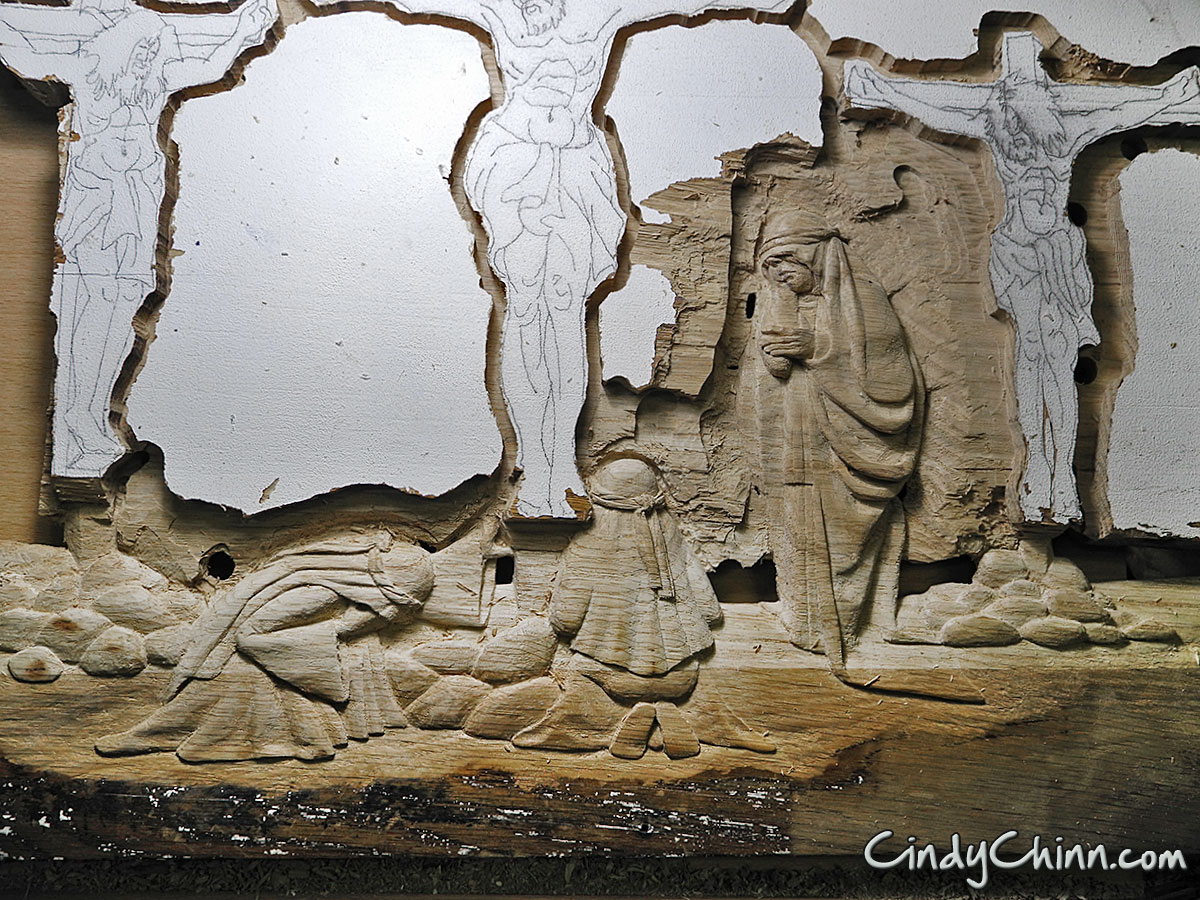
You can also see the difference in the wood on the bottom where a darker piece was used. Now with the mourning figures carved it’s time to start the two criminals being crucified before starting Jesus. Here I have them roughed in, there is still a lot of detail to add:
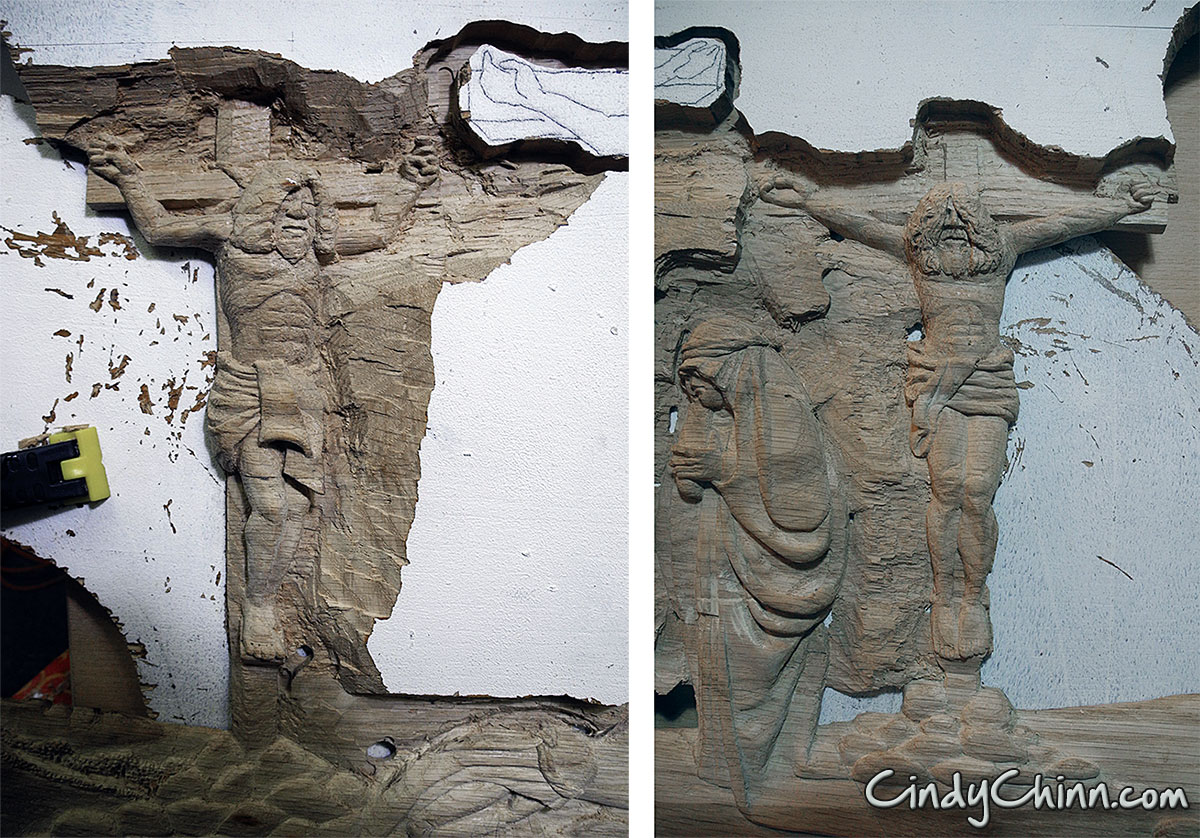
More carving… more detail.., more background removed… The crucifixion scene is coming together:

Here is a detail of one of the criminals:
One of the challenges of carving is that once you have removed the material, it is gone. Gone, Gone, Gone! And if you didn’t plan ahead for things like foreshortening, you are Hooped! Hooped, Hooped, Hooped! …and your design has to change… like fingers get smaller or at an awkward angle. The faces are about an inch long from the top of the head to the chin. There isn’t a lot of room adjustment.
ALSO, this project has reminded me that a good carving tool should be sharp. A sharp tool that slides through oak, will easily slide through flesh as well. Never cut towards you and always keep your other hand out of the path of the blade!!! (and to keep bandages close in-case you forget that golden rule) Blood stains raw oak…
Thanks for watching my progress, I will have more photos posted soon.
New photos today! Feb 28, 2013 The carving is coming along nicely and almost done!


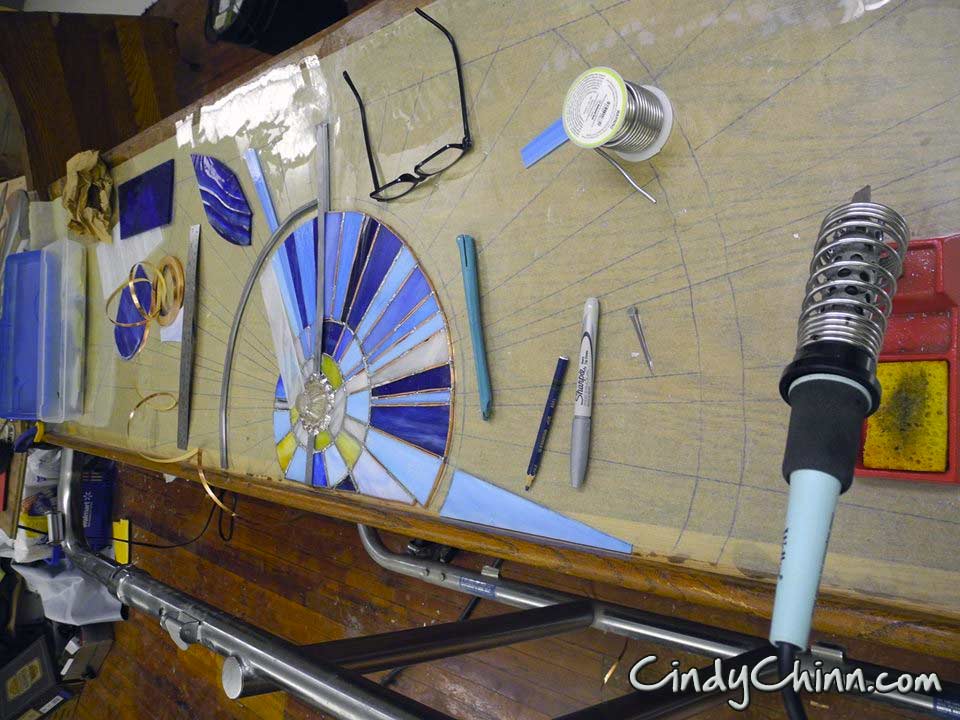
Now it’s time for stage two – I am designing and building a stained glass background to sit behind the carving. I don’t get to do this much, so I’m having a lot of fun getting back into glass work.
YAY! More progress on the glass. I should have this done very soon. 😀
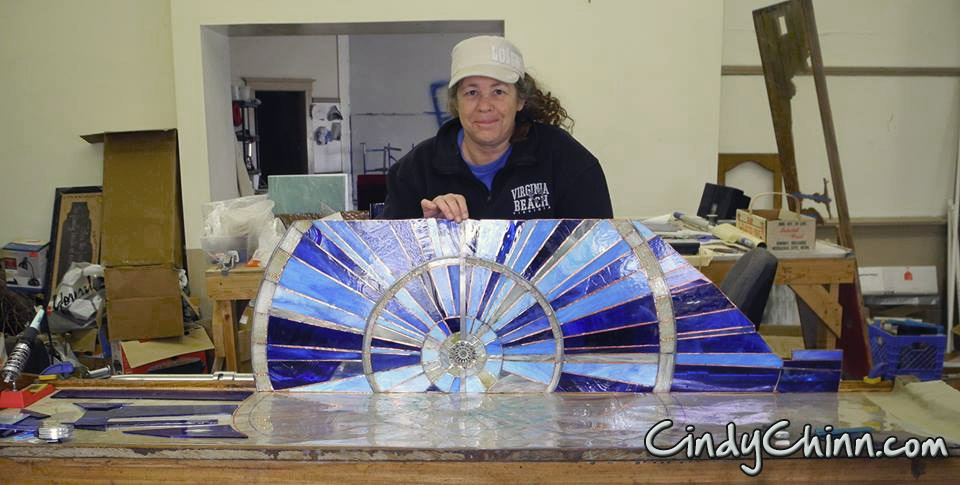
A sneak preview and placement check of the almost finished glass-
After I finished the stain glass, I sanded the rest of the pieces and put the pew back together. It is now ready for staining and sealing. I used a water based stain (3 coats) and Minwax Antique Oil (another 3 coats) Sanded and buffed between coats.
There was a hole where another bench would attach to this one, so I needed to cover it. I have been tumbling glass in my cement mixer to use in a concrete project so I took Super Clear Plastic Resin and mixed it together to fill the space. I embedded my signature made of thin copper wire. Getting the correct mix of resin and hardener was a bit of a challenge!

the stain glass needs light… so I made a box that fits behind the back to house the lighting in. I put a switch on the bottom so that it can be turned on and off and is out of the way. 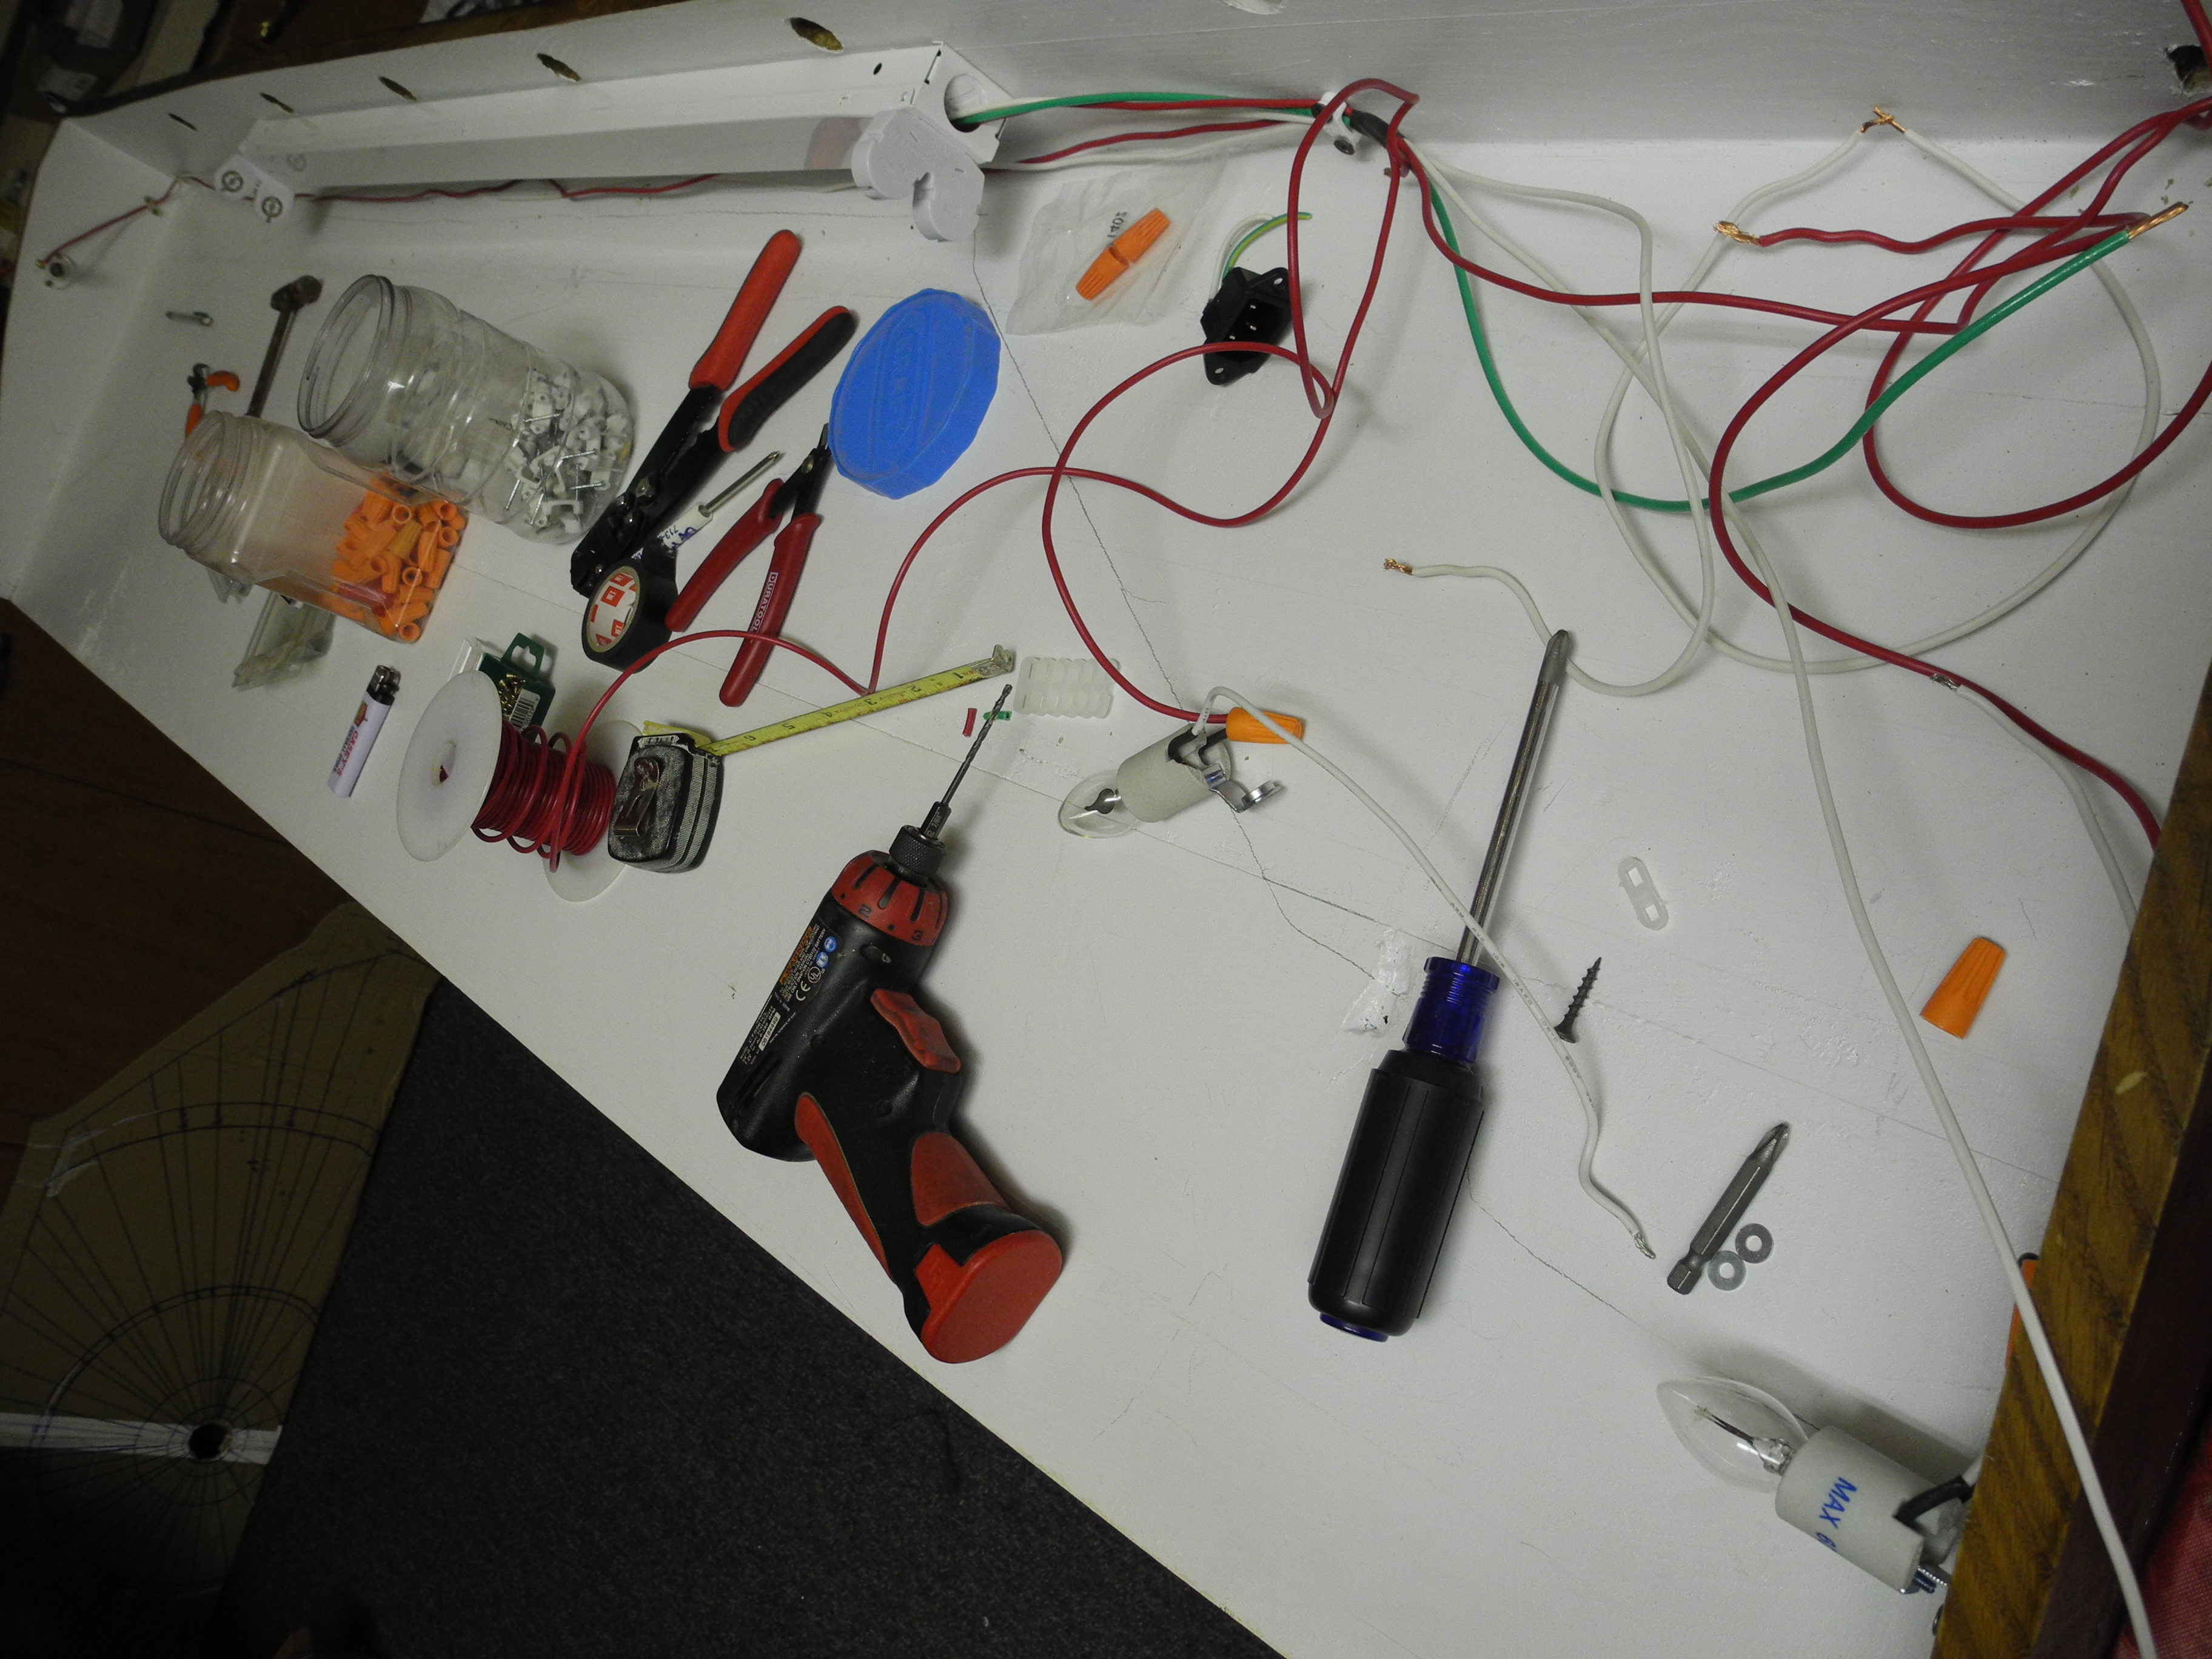
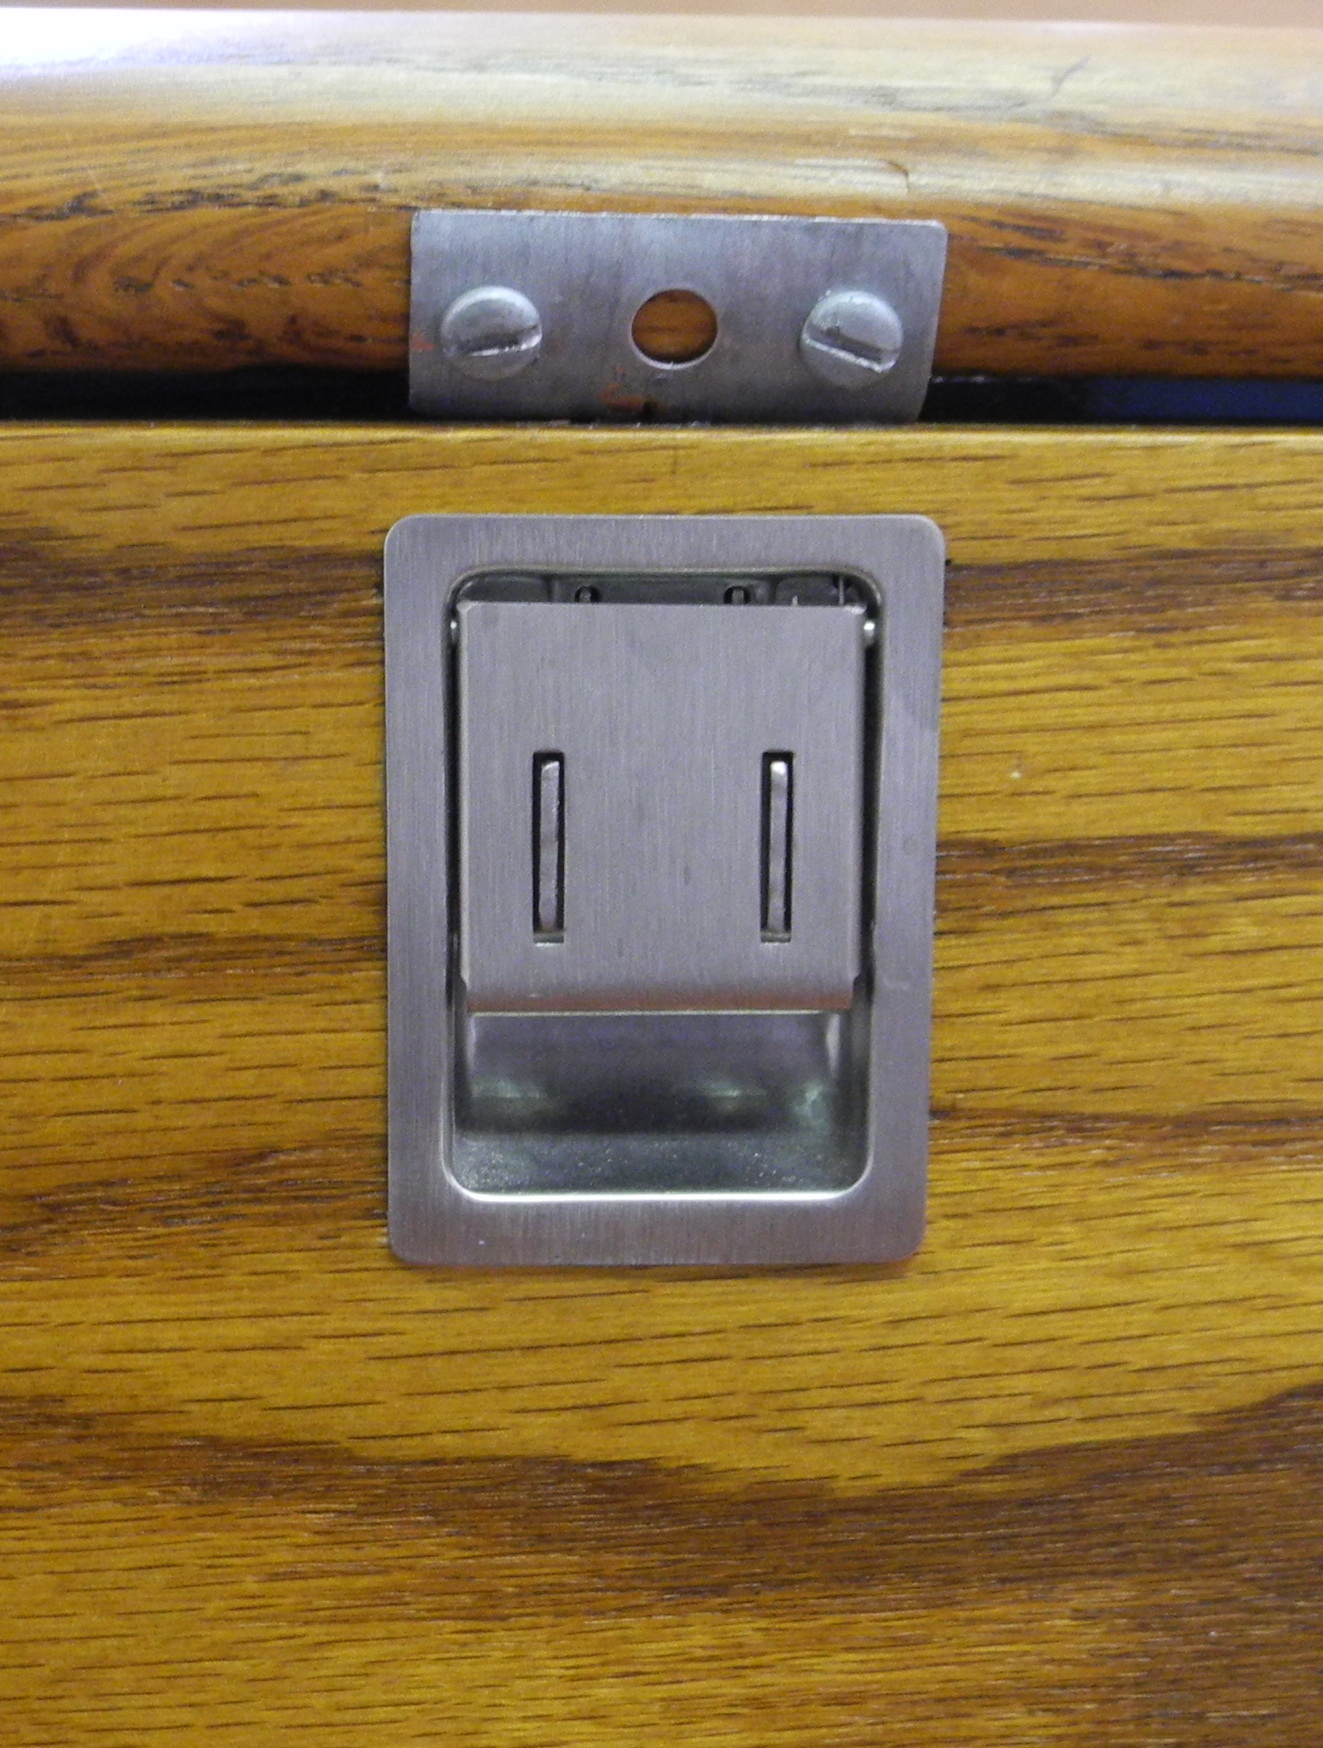
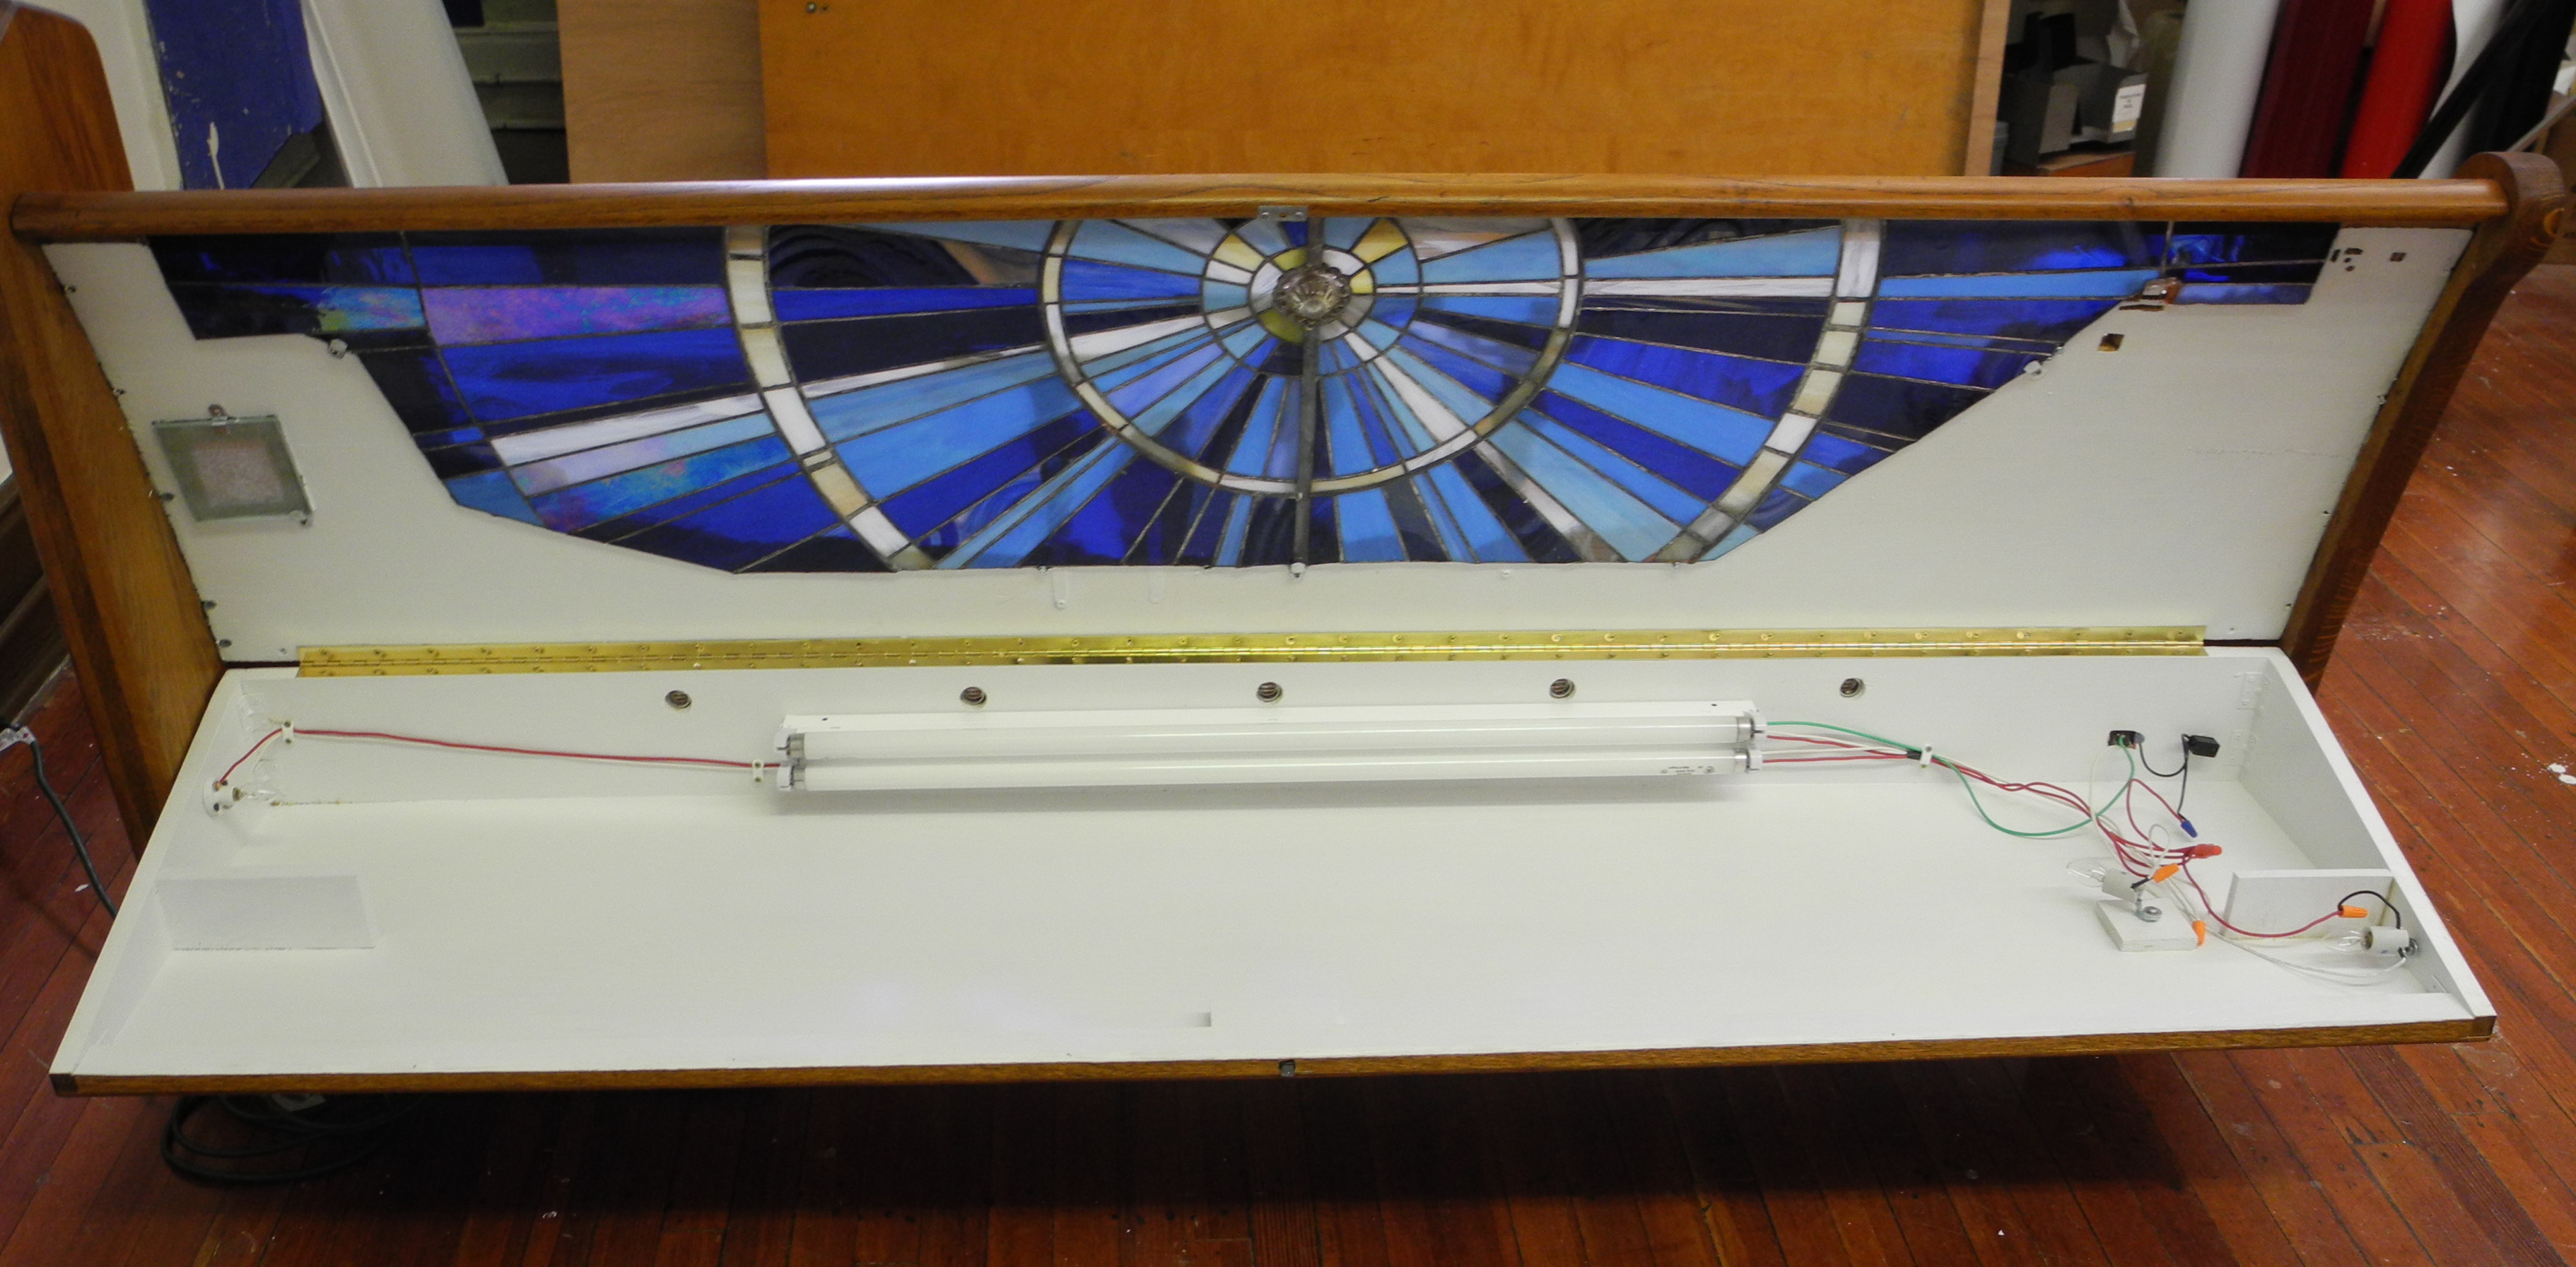 I painted the inside with a White gloss paint to reflect the light more. I had planned to put flickering bulbs near the windows but the flicker was getting lost even with the partitions installed, so I went back to clear warm light bulbs. the florescent bulbs are cool white as to not effect the overall color of the blue glass… I didn’t want the glass to look green. I also added a recessed latch so that it would be flush.
To protect the bench and to keep people (kids) from getting too close, I made stanchions of left over oak wood from the light box and a granite table top that I had in the wet room. I cut that in half and polished the edges. I added the granite because I needed the weight to keep them from falling over from the weight of the blue velvet rope that I ordered.
Well, another project completed!
I have about 700 hours, probably more than that, into this project over the past 3 and a half months. I have learned a lot about a lot of different mediums and look forward to the next project, though I’m thinking that it will not be wood or stain glass and definitely not cast resin! More than likely, it will be an 8’x10′ mural that I need to have finished in May.
Thanks for following along and follow the link to this page for the final photos
Pingback:Hand Carved Crucifixion Scene on Pew - Complete | Artist Cindy Chinn
Great concept and follow through… Attention to detail is impeccable.
And on a church pew, first one I have seen carved like that.
Backlighting with stained glass adds another dimension to pull everything together. WOW!!
Impressive…..
Amazing, stunning work!
Pingback:Hand Carved Church Pews by Cindy Chinn
Good day – LOVE YOUR CARVINGS! Want to know – how do you transfer you pattern onto the wood? It looks like paper that is glued to the wood. I’m new in this business and it takes me ages just to transfer my patterns, specially when it is a big piece.
A lot of times I’ll use tracing paper – sometimes I’ll just adhere the paper.
Pingback:Hand Carved Crucifixion Scene on Pew « Completed Work «